
Luxury Corporate Gifts for Diwali and New Year: 5 Gift Items Employees Will Love in 2026

Luxury Corporate Gifts for Diwali and New Year: 5 Gift Items Employees Will Love in 2026
As Diwali and New Year are around the corner in 2026, companies are beginning to think about premium, luxury corporate gifts to add to the overall experience. This is the perfect time for every corporation to facilitate achievements and strengthen their employees’ bonds. So, choosing luxury corporate gifts for Diwali and New Year may become a tedious task. Opting for the best corporate Diwali gifts adds value while creating a lasting impression for your brand.
In this blog, we have sorted the information and created a perfect list of premium gift hampers and personalized accessories known for their usefulness and quality. Also, if you are looking to buy bulk corporate gifts at wholesale prices, you can simply procure them at Moglix Business. We ensure the delivery of products across pan-India and create a memorable experience for your employees and clients.
Why Luxury Corporate Gifting Matters During Diwali and New Year?
A festive gifting solution for Diwali and New Year elevates the overall experience of your employees and clients. So, it is necessary to find the right gift for business to create a positive employee experience. What makes it an important part of corporate culture includes:
- A good and well-thought-out corporate gifting programme makes employees feel rewarded, recognized, and appreciated.
- It’s a great way to build healthy relationships and create opportunities to celebrate together.
- Employee contribution is essential, and appreciating them through gifts is a perfect way.
- Right and valuable gifts during festivals and events always showcase consistency and reflect organizational values towards employees.
Five Luxury Corporate Gift Ideas to Make Your Employees Feel Special
Based on the latest trends, we have curated a list of the top 5 premium luxury corporate gift ideas you can opt for. Let’s go through them quickly.

Premium Festive Gift Hampers
One of the most trending options is to opt for premium-quality festive gift hampers, which consist of a variety of assorted edible products. For example, you can fill a variety of chocolates, dry fruits, cookies, and festival decorations in different varieties of well-designed hampers. You can put the business’s brand name and logo on traditional packaging and greeting cards.
Why employees will love it:
- Treats galore for the festive season.
- Premium gifting experience with attractive packaging.
- Options to tailor hampers to fit different budgets.
- Great for single gifts or bulk corporate orders.

Custom Office Accessories Premium
Luxury office accessories make for an unforgettable moment for employees and clients. Gifts such as high-end notebooks, pens, desk organizers, water bottles, glass accessories, and leather accessories will be given out. You can select them according to the level of seniority in different departments. You can also add the names of employees with the company logo. This creates brand consistency and is useful.
Why employees will love it:
- It is convenient for everyday office use
- Personalized gift designs are thoughtful.
- Premium materials for a professional look.
- Suitable for Diwali gifting, New Year celebrations, and work anniversaries.

Tech Gadgets and Accessories
Electronic and technology-based gadgets are something that elevates the overall experience of your employees. They offer digital services that can help in their daily work life. These types of corporate gift solutions include wireless chargers, Bluetooth speakers, wireless headphones and earbuds, power banks, and other essential accessories.
But when you decide on high-end gadgets, you need to understand the ground-level needs by providing every employee with a perfect solution with product quality and warranty coverage, making them useful for everyday usage.
Why employees will love them:
- Useful at work, during travel, and at home.
- Offer a modern premium gift experience.
- Available in various price points for bulk orders.
- Suitable for employees across age groups and job roles.

Premium Drinkware and Lifestyle Gifts
Premium drinkware and lifestyle products play a pivotal role in the overall experience and keep your employees excited with gifts offering a stylish finish and used for everyday work life. These types of gifts consist of various products like water bottles, coffee mugs, reusable water bottles, smart insulated bottles, travelling tumblers, etc. However, while buying these products, you need to pay attention to their quality, durability and other personalization options.
Why employees will love them:
- Useful for daily routines at work and at home.
- Encourage the use of reusable products.
- Offer opportunities for tasteful customization.
- Easy to distribute across teams and office locations.

Electrical Home and Kitchen Appliances
One of the most effective and efficient gifting solutions is kitchen appliances that make luxury corporate gifts for Diwali and New Year. It includes products like electric kettles, grinders, air fryers, mixers, water heaters, vacuum cleaners, and other compact kitchen or daily use appliances. The chief importance of these products is to be useful and to provide valuable festive celebrations
Why employees are going to love them:
- Good for everyday cooking and household needs.
- Deliver value that lasts well beyond the festive season.
- Available in various price ranges to fit corporate gifting budgets.
- Suitable for bulk corporate gifting and employee recognition programmes.
How to Choose the Right Luxury Corporate Gifts for Employees?
The above-mentioned products and corporate gifting items can only improve the overall experience of your employees and clients. What makes them great is their reliability, employee interest, and expense with a premium touch. But before buying, some important points, such as the objectives of the business and the company’s budget, need to be considered. Here is a quick review of them:
- Always be aware of what your employees expect, what their interests are, and what work styles they have.
- Specify as per the organization’s budget and discuss with internal teams before finalizing.
- Choose products that not only look premium but are also durable and nicely packaged.
- Bulk ordering may be a little daunting. So, you can collaborate with Moglix Business, India’s best online corporate gifting solution provider, with pan-India delivery.
Make Festive Celebrations Special with Moglix Business
Corporate gifting is an important part of any business to appreciate employees’ hard work and celebrate every festive occasion or event together. We have curated a list of the top 5 luxury corporate gifts for Diwali and New Year. From premium festive hampers and personalized office accessories to tech gadgets, lifestyle products, and wellness sets, the right gifts can make these occasions more meaningful.
So, if you are looking to buy Diwali and New Year gifts for your employees and clients in bulk, then you can procure them at Moglix Business. We ensure delivery of the best corporate gifts that not only deliver a premium and luxurious touch but also fall within your budget and create valuable memories.
10 Best Diwali Corporate Gift Ideas for Employees and Clients in 2026

10 Best Diwali Corporate Gift Ideas for Employees and Clients in 2026
Corporate gifting plays a major role in various organizations to appreciate employees and create a happy environment with amazing and presentable gift hampers. However, choosing the right gift is essential to create a connection between all employees and foster engagement. As we all know, Diwali 2026 is almost knocking at our doors, and various corporates have started planning for some eye-appealing and popular Diwali gifts at wholesale prices and for bulk purchase.
In 2026, corporate gifting has moved beyond just common gift hampers and boxes. Businesses not only innovate in their work process but also create some memorable moments by gifting top-quality products, personalized hampers, premium accessories, and eco-friendly gifts to enhance the experience of their employees. So, if you are also looking to buy corporate gifts for Diwali 2026, then Moglix Business is your all-season companion to procure gifts in bulk at wholesale prices. In this blog, we have provided you with information on the best Diwali gift ideas for corporate employees and clients based on your requirements.
Why Corporate Diwali Gifting Matters for Businesses?
Every employee inside an organization works hard and smartly to achieve new heights in their career and take the business to new heights. Therefore, it becomes a prime responsibility for organizations to make their employees happy by gifting valuable hampers during festivals like Diwali and others. It strengthens a bond between management and employees, and between clients and management.
Complete List of 10 Best Corporate Gift Ideas
Based on the latest trends and requirements, we have collected the data and provided you with a complete list of corporate gifts to surprise your employees and clients.

Customized Gift Boxes with Company Branding
Customized gift boxes with premium and company branding have always been a premium and professional presentation. Now, inside these, you can simply add assorted items like assorted cookie tins, dry fruits, healthy snacks, stationery products, drinkware, and other lifestyle accessories. Now, based on your requirements, you can ask for customized packaging and personalized colours.
Best for: Enterprise clients, channel partners, dealers, distributors, and employees.

Electronics and Tech Accessories
One of the most popular and innovative ways to enhance the experience of your employees is to gift them electronics and tech accessories. They are considered to provide great usability and consist of everyday utility options. You can gift wireless chargers, wired earphones, Bluetooth speakers, power banks, wireless earbuds, smartwatches, and USB hubs for employee rewards and client gifting.
Best for: Technology teams, senior employees, and premium client gifting.

Branded Office Essentials
Office accessories are also among the most practical Diwali gifts for employees. In this, businesses can consider premium-quality notebooks, pens, reusable water bottles, desk accessories, sticky notes, wooden desk accessories, and laptop sleeves. Also, you can add the logo of your brand and personalized messages.
Best for: Employees, new joiners, and business associates.

Personalized Corporate Gift Hampers
Personalized gift hampers help businesses provide aesthetic and theme-based products with customized packaging. Hampers can include a collection of chocolates, drinkware, stationery, candles, and some gift vouchers. These hampers suit companies that want a consistent gifting experience across departments or client groups.
Best for: large employee teams, key clients, and corporate partners.

Sustainable and Eco-Friendly Gifts
Eco-friendly gifting products have gained the attention of many businesses during Diwali to make a responsible and sustainable gifting process. This Diwali, you can simply provide gifts like reusable bottles, jute bags, bamboo bags, organic cotton apparel, recycled notebooks, wooden desk accessories, and many more. Pairing these products creates a mesmerizing experience for employees and clients towards a sustainable goal.
Best for: Sustainability-focused organizations, employees, and clients.

Premium Drinkware and Tableware
In offices, employees’ desk incomplete without their water bottles and other drinking accessories. Gifting insulated water bottles, sippers, glass bottles, steel mugs, and handle mugs with a brand logo serves as a practical approach to Diwali gifting with long-term usability.
Best for: Employees, customers, and large-scale corporate gifting programmes.

Festive Home Décor and Lighting
Diwali is synonymous with lights, celebrations, and home decoration. Decorative diyas, LED lamps, candle sets, festive lanterns, and elegant décor pieces make meaningful gifts for employees and clients.
Best for: Employees, clients, and festive appreciation campaigns.

Wellness and Self-Care Hampers
Wellness hampers offer a thoughtful way to recognize employees and encourage work-life balance. Depending on the audience, these can include herbal teas, scented candles, aromatherapy products, relaxation accessories, and personal-care essentials.
Best for: Employees, team leaders, and employee appreciation initiatives.

Premium Travel and Lifestyle Accessories
Travel and lifestyle organizers are one of the most perfect and suitable gifts for employees, as every individual is a travel enthusiast, primarily those who work in a hybrid model. You can select products like backpacks, gym bags, folding bags, laptop bags, totes, and many more. These products offer lasting value and are suitable for companies looking for alternatives to conventional festive hampers.
Best for: Senior employees, frequent travellers, and important business clients.

Home appliances
During festive seasons, employees aspire to buy new home appliances. So it’s better to gift home appliances that can fulfill their daily requirements and make their life easier with new tech-oriented home appliances. You can gift various home appliances such as room heaters, water heaters, ovens, microwaves, steam irons, immersion rods, and smart bulbs.
Best for: Employees, clients, vendors, and business partners.
How to Choose the Right Corporate Diwali Gifts
Selecting the right gifts requires balancing recipient preferences, budget, quality, and delivery requirements. Keep these factors in mind when planning your corporate gifting programme for 2026.
- Define your budget: Establish a per-recipient budget and allocate spending according to the gifting audience.
- Understand your recipients: Choose practical gifts for employees and thoughtful, premium options for important clients.
- Prioritize quality and utility: Select products that recipients can use beyond the festive season.
- Consider personalization: Add branded packaging or festive messages where appropriate.
- Plan bulk orders early: Confirm quantities, product availability, packaging, and delivery timelines well before Diwali.
- Choose a reliable gifting partner: Work with a supplier that can support product selection, bulk procurement, customization, and coordinated delivery.
Simplify Bulk Corporate Gifting with Moglix Business
Every business wants to create a happy environment and reward its employees with the best gifts. Whether it is any festival or reward, every business requires amazing gifts for its loving and hardworking employees. So, if you are also looking for bulk purchase of corporate gifts at wholesale prices, you can log in to Business Moglix. We provide you with a wide range of corporate gifting products for Diwali 2025 and reward your employees with the best gifts. Explore Moglix’s corporate gifting solution and delve into categories you find most mesmerizing.
Frequently Asked Questions
1. What are the best corporate Diwali gift ideas for 2026?
Popular options include dry fruit hampers, personalized gift boxes, electronics, branded office accessories, sustainable products, premium drinkware, festive décor, and wellness hampers.
2. What should businesses gift their clients on Diwali?
Businesses can consider premium hampers, customized gift boxes, elegant décor, executive accessories, and high-quality tech products, depending on the relationship and budget.
3. How can companies manage corporate Diwali gifts in bulk?
Companies should finalize their recipient list, budget, product selection, branding requirements, and delivery schedule early. Working with a corporate gifting solution provider can help streamline procurement and distribution.
4. How can businesses choose cost-effective corporate Diwali gifts?
Compare product quality, customization costs, packaging, minimum order quantities, and delivery charges. Prioritize useful products and negotiate bulk pricing to manage the overall gifting budget.
How to Select the Right MRO Supplier for Your Business
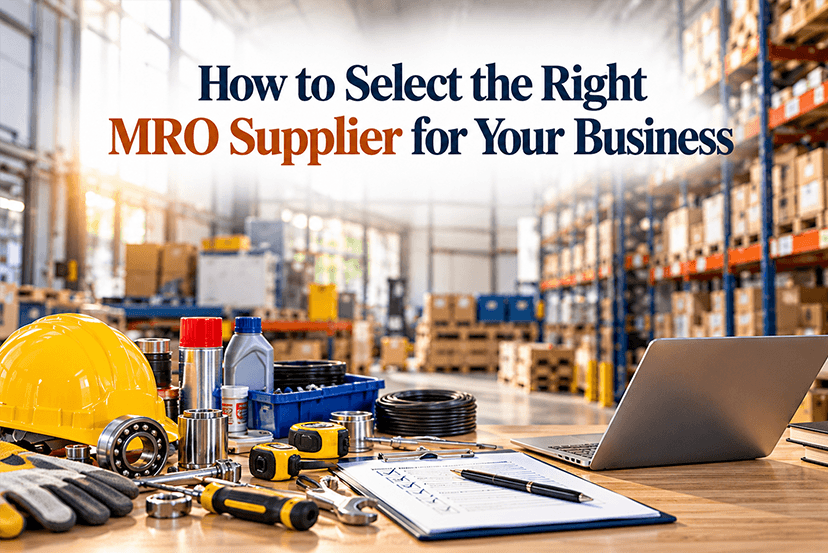
How to Select the Right MRO Supplier for Your Business
In the digital era of procurement, every business wants to stay ahead by selecting the right MRO supplier. It is necessary to understand the right operational efficiency, decrease procurement costs, and avoid delays. There are several MRO solution providers in the market, but choosing one can be a little challenging that fulfills your requirements. Businesses and enterprises need to focus on suppliers who ensure timely delivery, sufficient stock of industrial supplies, safety equipment, tools, spare parts, and maintenance of suppliers. Therefore, choosing the right and reliable MRO solution providers helps businesses to manage their inventory, streamline complete purchasing, and maintain consistency.
8 Things To Consider Before Collaborating With MRO Suppliers
We have curated 8 things to consider before collaborating with MRO suppliers, such as:
- Check the product range and availability
The very first thing is to identify the range of products that can be delivered by MRO suppliers. It primarily consists of power tools, office supplies, lubricants, safety equipment, electrical components, and fasteners. Quickly go through a brief product brochure or portfolio with bulk procurement options before collaborating with a supplier - Quality and Certifications
Quality is the primary concern for every business. It is good to have a diverse catalog, but quality should be foremost. So, always verify the product before the final call through reviews and the brands they collaborate with. - Evaluate total procurement cost
The next step is to examine the pricing, not the lowest quotation. Yes, you can compare the prices of different MRO suppliers and get the best value. Also, you can compare the shipping prices, product cost, payment terms, and after-sales support. - On-time supplies and delivery
Opt for MRO suppliers who keep their promises at peak with a good track record of delivery and supplies. Delays in supplies can hamper your operation and may increase the cost of production. You can check the stock availability for the season and order fulfilment capability. - Review overall Support
Genuine and reliable technical guidance becomes important for a business while dealing with MRO suppliers. Also, warranty support and product selection assistance improve the experience while procuring products. - Evaluate Digital Procurement Capabilities
Digital platforms in MRO supply, like Business Moglix, bring your purchasing online with automated quotes, tracking, and supplier coordination under one roof. Additionally, consider a few things: online catalogue, wholesale prices, bulk procurement, inventory visibility, and GST invoices. - Analyze Supplier Ability
Businesses can analyze MRO suppliers with genuine client testimonials, industry experience, and order delivery percentage. Apart from this, analyze the pattern of suppliers by knowing their support for business growth with additional facilities and procurement volumes. - Prioritise Inventory and Supply Chain Management
The right MRO supplier must have a complete balance between tier availability of stock and inventory cost. So before you finalize the MRO supplier, it becomes important to discuss the MOQs and 12-month availability of components.
Why Is It Crucial To Collaborate With The Right MRO Supplier?
There are multiple benefits of choosing the right MRO supplier, such as:
- It ensures the timely delivery of products, which improves your daily operations.
- Gives you the opportunity to do bulk purchases with better negotiation of prices.
- Easy to create relationships with vendors, and procurement teams have better purchasing power.
- Prevents stock shortages and keep syour onvetory upto date.
- In cae of any urgent supply, you can proceed directly, process your requirements, and get them ASAP.
Conclusion
Selecting the right MRO supplier requires evaluating product availability, quality, pricing, delivery performance, technical support, and digital procurement capabilities. Businesses should prioritise suppliers that understand their operational requirements and can provide reliable, cost-effective, and scalable solutions. A well-chosen MRO partner like Business Moglix helps streamline procurement, control maintenance expenses, and support uninterrupted business operations.
Types of Plywood Famous in India: Use Cases and Selection Guide

Types of Plywood Famous in India: Use Cases and Selection Guide
Plywood is a widely used wood material for various purposes and is highly valued due to its great strength, versatility, and easy installation process. Whether you are looking for modular kitchens, wardrobes, door panels, partition slabs, or any other construction work, it is necessary to understand the specific use cases of every type of plywood and their importance. In India, there are various types of plywood selected based on design, environment, and application. Today we will discuss various types of plywood based on various factors such as budget, load requirements, and thickness levels. Let’s take a quick look at them. Businesses and industries require plywood in bulk for various construction processes. So, if you are also looking to buy plywood in bulk can simply procure it at Business Moglix.
What Is Plywood?
Plywood is a reliable and effective wood panel engineered by bonding multiple layers of thin wood together. The layers are arranged in a specific and alternating manner to improve the stability and strength of the plywood. However, it also depends on the manufacturing process and adhesives used, which overall signify the plywood’s resistance, strength, and durability.
Also read: Top 10 Best Plywood Manufacturing Companies in India 2026
List of Popular Types of Plywood in India 2026
We have curated a list of various plywood types to make you aware and find the right product based on your furniture requirements.
- MR Grade Plywood: This type of plywood is called commercial plywood, primarily used for various types of indoor applications. It has a great ability to stand up to humidity but may be weak against prolonged water exposure. MR grade plywood is used for wardrobes, beds, tables, office furniture, and other interior partitions.
- BWR Plywood: This plywood has better moisture resistance compared to MR plywood. It is used for manufacturing various furniture which experience occasional water contact and high humidity. Therefore, BWR is suitable for kitchen panels, bathroom furniture, doors, and other semi-moist applications.
- BWP or Marine Plywood: This type of plywood is also known as marine plywood, with the ability to stand up to high moisture exposure and boiling water conditions. It is a perfect option for kitchen cabinets, bathroom units, sink cabinets, outdoor furniture, and other water-resistant applications.
- Fire-Retardant Plywood: This type of plywood is designed to slow down the spread of fire and reduce the chances of any fire-driven incidents. Therefore, it is used in various commercial buildings, offices, kitchen sand electrical installations.
- Flexible Plywood: This type of plywood is designed to improve th flexibility and bend without any risk of cracks. Therefore, they are known for high strength and is used for decorative panels, columns, unique interior design, and curved furniture. They are primarily used by interior designers and architects.
- Hardwood Plywood: This type of plywood is made using hardwood veneers and is known for its strength, durability, and attractive finish. It is commonly used for high-quality furniture, cabinets, doors, tables, and structural interior applications where better mechanical performance is required.
- Softwood Plywood: This plywood is known for its lighter weight and is easy to carry or handle. This feature makes it a perfect wood material for partitions, packaging material, construction application another light duty projects without compromising strength.
- Decorative Plywood: As the name indicates, decorative plywood offers great appearance and performance. Therefore, it is used for crafting attractive wood grains, finished surfaces, and veneers for premium sections of furniture such as wall panels, cabinets, and interior decor.
How to Choose the Right Plywood?
If you are planning to buy plywood in bulk, you need to focus on various factors like:
- Moisture exposure: You can consider MR plywood for dry interiors, whereas opt for BWR or BWP plywood for humid and moisture-resistant areas.
- Strength: Always consider the strength of the plywood to easily hold the expected load and structural requirements. Hardwood or high-quality structural plywood can be preferable for heavy-duty applications.
- Application: Always decide the right use of plywood, such as for kitchen woodwork, door panels, partitions, decorative work, or any type of construction project.
- Thickness: Choose the right thickness of plywood, such as 4 mm, 6 mm, 9 mm, 12 mm, 16 mm, 18 mm, and 25 mm.
- Core and Surface Quality: Check veneer quality, uniform thickness, bonding, surface finish, and the absence of major gaps or defects.
- Certification and Standards: For professional and other construction projects, always look for high-quality, reliable, and Indian condition and standard plywood.
- Budget: Do not compromise on the budget while buying plywood. Buying low-grade plywood can cost you a longer period. So, opt for high-standard and quality plywood with great durability.
Also read: Difference Between IS 303 vs IS 710 Grade Plywood
Conclusion
In India, there are multiple uses of plywood, due to which there is a wide range of plywood options available in the market. It includes MR, BWR, BWP/marine, fire-retardant, flexible, hardwood, softwood, and decorative plywood. You can opt for a specific type of plywood based on requirements and prupsoes. Based on moisture conditions, quality standards, required strength, and thickness, you can find the specific type of plywood useful for various purposes. If you are looking to buy plywood in bulk at wholesale prices, then you can simply procure it at Moglix Business.
What Are the Different Types of Poles? A Complete Guide 2026
What Are the Different Types of Poles? A Complete Guide 2026
Poles are vertical structures used across electrical distribution, telecommunications, street lighting, construction, agriculture, fencing, and infrastructure projects. They are designed to support electrical cables, communication lines, lighting fixtures, signs, fencing systems, and other equipment. Depending on the application, poles can be manufactured from materials such as steel, concrete, aluminium, wood, or composite materials.
Choosing the right type of pole depends on several factors, including load capacity, height, material, installation location, environmental conditions, durability, and intended application. If you are looking to procure poles in bulk at wholesale prices, you can simply purchase them at Moglix Business.
For example, an electrical distribution pole must safely support conductors and electrical equipment, while a street light pole primarily needs to provide adequate height and stability for lighting fixtures. This guide explains the different types of poles, their materials, applications, advantages, and important selection factors.
What Is a Pole?
A pole is a vertical structural member installed to support or carry equipment, cables, wires, lights, signs, or other infrastructure components. Poles are commonly used in power transmission and distribution, telecommunications, street lighting, construction, agriculture, fencing, and industrial applications.
Poles are generally classified according to their material, design, shape, and application. Common examples include electrical poles, concrete poles, steel poles, street light poles, utility poles, telecom poles, and fencing poles.
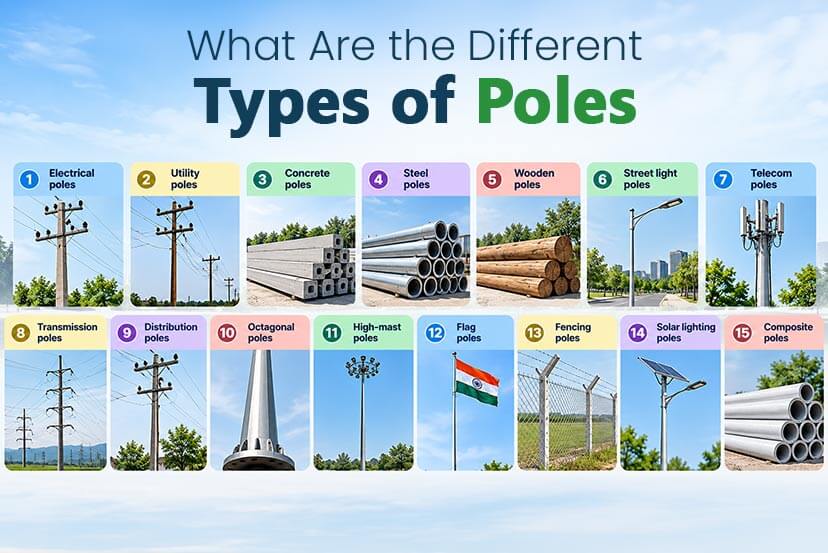
What Are the Different Types of Poles?
The main types of poles include:
- Electrical poles
- Utility poles
- Concrete poles
- Steel poles
- Wooden poles
- Street light poles
- Octagonal poles
- Fencing poles
- Solar lighting poles
- Telecom poles
- Transmission poles
- Distribution poles
- High-mast poles
- Flag poles
- Composite poles
Each type is designed for a particular structural and operational requirement.
Elaboration Of Every Specific Type Of Pole For Better Understanding
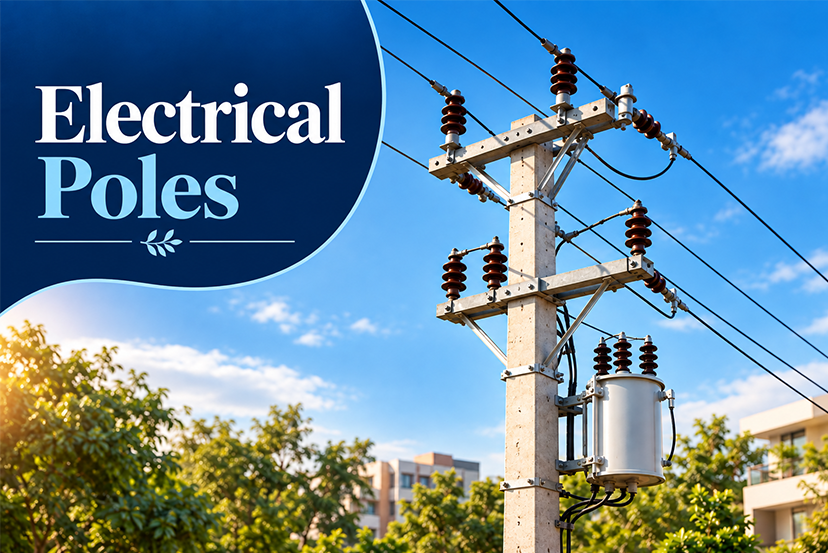
1. Electrical Poles
Electrical poles are used to support overhead electrical conductors and associated equipment. They are commonly installed along roads, residential areas, industrial sites, and rural locations for electricity distribution.
Electrical poles may be manufactured from reinforced concrete, steel, wood, or composite materials. Their dimensions and load-bearing capacity depend on the voltage level, conductor arrangement, span length, and equipment installed on the pole.
Applications:
- Overhead electricity distribution
- Supporting electrical cables
- Distribution transformers
- Insulators and electrical accessories
- Rural and urban power networks
When selecting an electrical pole, consider its height, mechanical strength, working load, foundation requirements, and electrical network configuration.
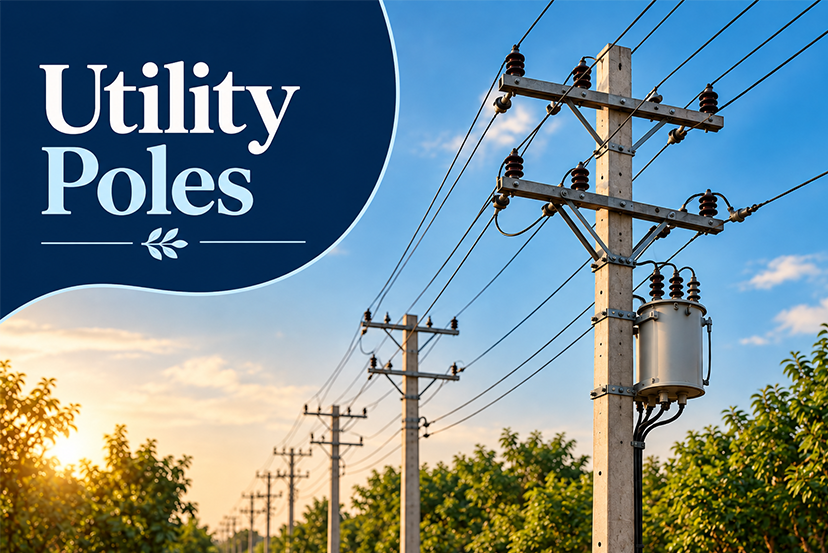
2. Utility Poles
Utility poles are general-purpose support structures used by utility companies to carry different overhead services. A single utility pole may support electrical conductors, telephone cables, fibre-optic lines, streetlights, and other infrastructure.
Utility poles are particularly common in urban and rural utility networks.
Common materials include:
- Concrete
- Steel
- Wood
- Fiberglass or composite materials
The appropriate material depends on environmental conditions, expected loads, maintenance requirements, and service life.

3. Concrete Poles
Concrete poles are manufactured using concrete, usually reinforced with steel to improve their structural strength. They are widely used for electrical distribution and utility applications because of their resistance to weather, moisture, insects, and corrosion-related deterioration. Concrete poles can be designed in different shapes and dimensions depending on the application.
Advantages of concrete poles:
- High structural strength
- Long service life
- Good resistance to weather
- Low susceptibility to termites
- Suitable for electrical distribution
- Relatively low routine maintenance
Prestressed concrete poles are also used where higher strength and controlled structural performance are required.
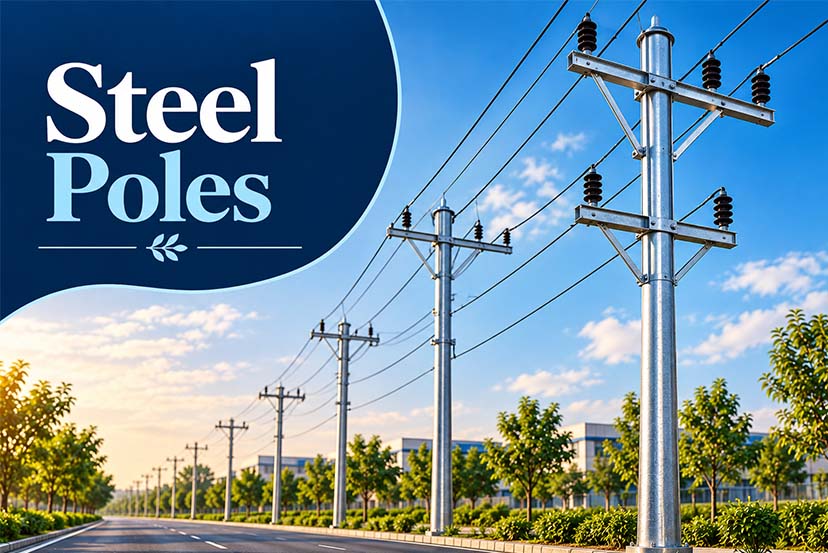
4. Steel Poles
Steel poles are manufactured from structural steel and are widely used where high strength and a relatively lightweight structure are required. They are commonly used for street lighting, electrical distribution, traffic infrastructure, signage, and industrial applications.
Steel poles may have circular, octagonal, tapered, or other cross-sectional designs. A protective coating such as galvanization can be used to improve resistance to corrosion, particularly in outdoor environments.
Common applications include:
- Street lighting
- Highway lighting
- Electrical distribution
- Traffic signals
- Signboards
- Industrial infrastructure

5. Wooden Poles
Wooden poles have traditionally been used for electrical and telecommunication networks. They are relatively lightweight and can be easier to handle and install than some heavier pole materials. Wood poles generally require suitable treatment to improve resistance to moisture, insects, fungal decay, and environmental exposure.
Applications include:
- Electrical distribution
- Telephone networks
- Rural utility infrastructure
- Temporary utility installations
Their suitability depends heavily on the type and treatment of wood, local environmental conditions, and required service life.

6. Street Light Poles
Street light poles are designed specifically to support lighting fixtures used on roads, highways, parking areas, campuses, industrial facilities, parks, and public spaces. They are commonly manufactured from galvanized steel, aluminium, or other corrosion-resistant materials.
Street light poles are available in different configurations, including:
- Single-arm poles
- Double-arm poles
- Decorative poles
- Octagonal poles
- Conical poles
- High-mast poles
The pole height and arm configuration are selected based on the lighting layout, road width, mounting height, and required illumination.
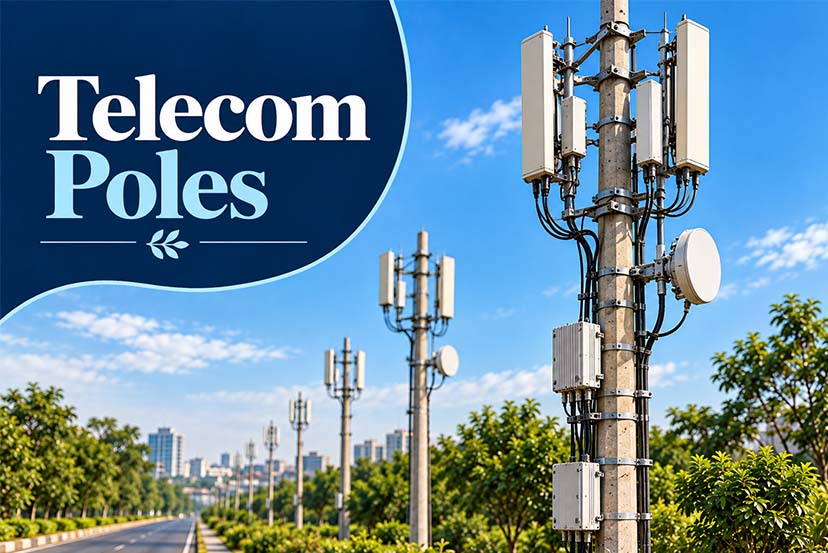
7. Telecom Poles
Telecom poles are used to support telecommunications infrastructure such as telephone cables, fibre-optic cables, communication lines, and associated equipment. They must provide adequate mechanical support while maintaining appropriate clearances between communication cables and other utilities.
Common applications:
- Fibre-optic networks
- Telephone lines
- Broadband infrastructure
- CCTV networks
- Communication cables
Depending on the network design, telecom poles may be made from steel, concrete, wood, or composite materials.
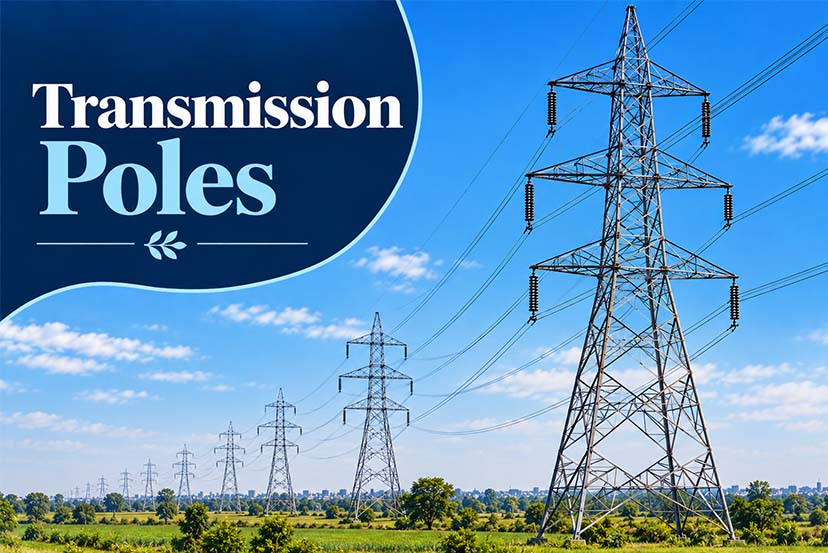
8. Transmission Poles
Transmission poles are used to support high-voltage transmission lines that transport electricity over long distances. These poles are generally taller and structurally stronger than standard distribution poles. Transmission structures may use steel or reinforced concrete, depending on the voltage, span, terrain, and network design.
Important considerations include:
- Conductor weight
- Wind loading
- Line voltage
- Span length
- Insulator arrangement
- Ground clearance
- Structural strength
For very high-voltage networks, lattice towers are also commonly used instead of conventional poles.
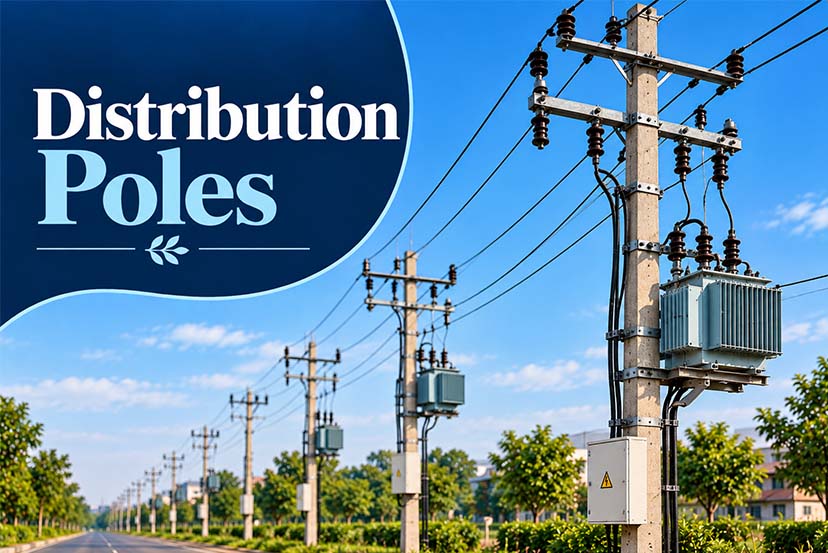
9. Distribution Poles
Distribution poles are used in electrical distribution networks to carry electricity from substations toward homes, commercial buildings, and industrial consumers. They generally support low-, medium-, or other distribution-voltage conductors, depending on the electrical network.
Distribution poles can carry:
- Conductors
- Insulators
- Transformers
- Switches
- Lightning arresters
- Communication cables
The pole specification must match the mechanical and electrical requirements of the distribution system.

10. Octagonal Poles
Octagonal poles have an eight-sided cross-sectional design. They are frequently manufactured from steel and are commonly used in lighting and infrastructure applications.
The octagonal shape can provide a useful combination of structural strength, weight efficiency, appearance, and ease of fabrication.
Applications include:
- Street lighting
- Highway lighting
- Parking-area lighting
- Industrial lighting
- Outdoor area lighting
Octagonal poles are available in different heights, wall thicknesses, base configurations, and arm arrangements.

11. High-Mast Poles
High-mast poles are tall lighting structures designed to illuminate large areas from a significant height. They are commonly installed where a large area needs uniform illumination using fewer lighting structures.
Typical applications include:
- Highways
- Airports
- Stadiums
- Ports
- Industrial plants
- Large parking areas
- Logistics and warehousing facilities
High-mast poles may incorporate multiple luminaires mounted around the top of the structure. Some designs use lowering systems that allow lighting equipment to be brought down for maintenance.

12. Flag Poles
Flag poles are vertical structures designed to display flags. They are commonly installed outside government buildings, corporate offices, schools, hotels, institutions, commercial facilities, and public spaces.
Flag poles may be manufactured from aluminium, steel, fiberglass, or other suitable materials.
Important factors include pole height, flag dimensions, wind conditions, mounting system, and installation foundation.
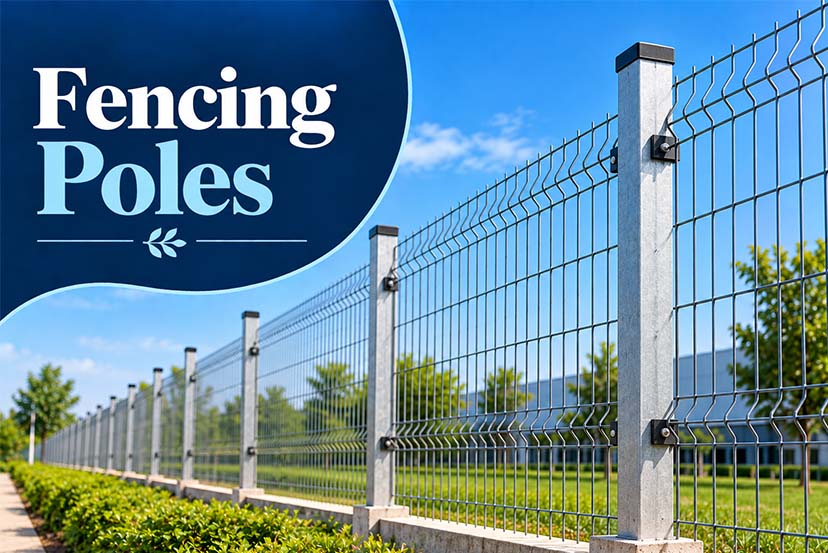
13. Fencing Poles
Fencing poles, also called fence posts, provide the structural framework for fencing systems. They are used with wire mesh, chain-link fencing, barbed wire, welded mesh, agricultural fencing, and security fencing.
Depending on the application, fencing poles may be made from:
- Galvanized steel
- Mild steel
- Concrete
- Wood
- PVC or composite materials
The required pole spacing and foundation depend on fence height, mesh type, wind exposure, and security requirements.

14. Solar Lighting Poles
Solar lighting poles support solar-powered outdoor lighting systems. These poles generally accommodate a solar panel, LED lighting fixture, battery system, controller, and associated wiring.
They are used in areas where grid-connected lighting may be difficult or where standalone renewable-energy lighting is preferred.
Applications include:
- Roads
- Rural pathways
- Parking areas
- Parks
- Industrial premises
- Campuses
- Remote locations
The pole height and structural design must account for the additional wind load created by the solar panel.
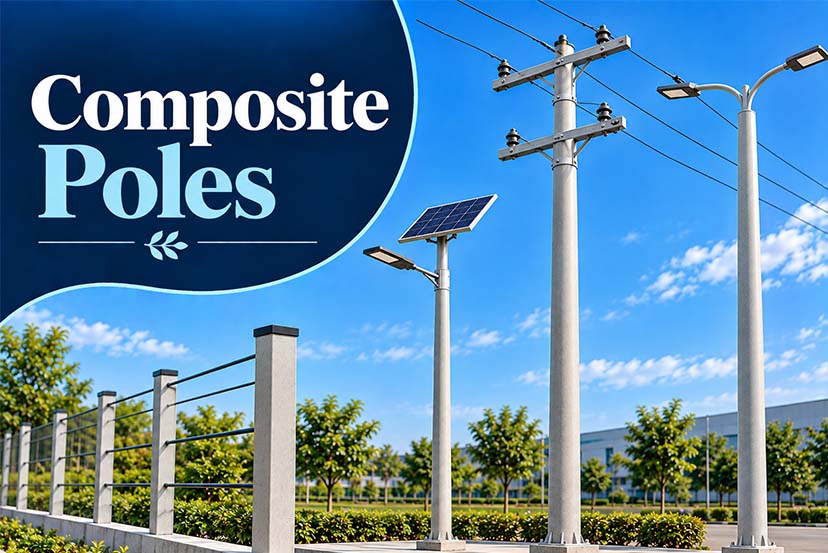
15. Composite Poles
Composite poles are manufactured using materials such as fiberglass-reinforced polymers (FRP) or other engineered composites. They are designed for applications where lightweight construction, corrosion resistance, and durability are important.
Composite poles can be considered for:
- Utility networks
- Telecom infrastructure
- Street lighting
- Coastal environments
- Corrosive industrial locations
One potential advantage is their resistance to corrosion compared with conventional metallic structures, although application-specific structural requirements should always be evaluated.
How to Choose the Right Pole?
Selecting a pole requires consideration of both the application and the installation environment. The following factors should be evaluated:
1. Application: First determine whether the pole will be used for electricity distribution, lighting, telecommunications, fencing, signage, solar lighting, or another purpose.
2. Pole Height: Pole height determines cable clearance, lighting coverage, equipment mounting height, and overall installation requirements.
3. Load Capacity: Check the expected vertical and horizontal loads, including the weight of cables, fixtures, transformers, signs, solar panels, and other equipment.
4. Material: Choose the material based on required strength, corrosion resistance, weight, maintenance requirements, environmental exposure, and expected service life.
5. Wind Load: Outdoor poles must withstand wind forces. This is particularly important for streetlights, solar panels, signs, high-mast structures, and communication equipment.
6. Corrosion Resistance: For coastal, humid, chemical, or industrial environments, corrosion-resistant materials or protective coatings can help extend service life.
7. Foundation and Installation: The pole must be compatible with the proposed foundation and installation method. Soil conditions, embedment depth, anchor arrangements, and site constraints can influence the final selection.
8. Standards and Specifications: For electrical and structural applications, poles should be selected according to the applicable Indian Standards (IS), utility specifications, project requirements, and relevant structural codes.
Key Factors to Consider Before Buying Poles
Before purchasing poles for an infrastructure or industrial project, consider the following:
- Pole material
- Overall height
- Diameter or cross-section
- Wall thickness
- Load-bearing capacity
- Wind-load rating
- Corrosion protection
- Mounting arrangement
- Foundation requirements
- Installation method
- Applicable standards
- Quantity required
- Site and environmental conditions
For bulk procurement, buyers can procure them at Moglix Business and should also compare technical specifications, manufacturer credentials, product quality, delivery timelines, warranty terms, and overall procurement cost.
Conclusion
Poles are essential components of modern electrical, communication, lighting, security, and infrastructure systems. From concrete and steel electrical poles to telecom, street light, high-mast, solar, fencing, and composite poles, each type serves a specific purpose. The right pole should be selected based on application, material, height, load capacity, wind conditions, corrosion resistance, installation requirements, and applicable standards.
For industrial and infrastructure projects, evaluating technical specifications and site conditions before procurement can help ensure reliable and long-term performance. For businesses looking for poles in bulk, comparing pole specifications, materials, dimensions, manufacturers, pricing, and procurement requirements can help streamline sourcing for electrical, lighting, construction, utility, and infrastructure projects.
Frequently Asked Questions
What are the main types of poles?
The main types include electrical poles, utility poles, concrete poles, steel poles, wooden poles, street light poles, telecom poles, transmission poles, distribution poles, high-mast poles, octagonal poles, solar lighting poles, fencing poles, and composite poles.
Which pole is used for electricity distribution?
Concrete, steel, and wooden poles can be used for electricity distribution. The appropriate type depends on the voltage, conductor arrangement, load requirements, span, environmental conditions, and utility specifications.
Which pole is commonly used for street lights?
Steel poles are widely used for street lighting because they can provide the required structural strength and can be manufactured in different heights, shapes, and arm configurations. Aluminium and other materials are also used for specific applications.
What are concrete poles used for?
Concrete poles are commonly used for electrical distribution, utility networks, telecommunications, and infrastructure applications where high structural strength and durability are required.
What is a high-mast pole?
A high-mast pole is a tall lighting structure used to illuminate large areas such as highways, airports, ports, stadiums, industrial sites, and large parking areas.
What is an octagonal pole?
An octagonal pole is a pole with an eight-sided cross-section, commonly manufactured from steel and used for street lighting, highway lighting, industrial lighting, and outdoor illumination.
What is the difference between a utility pole and an electrical pole?
A utility pole is a broader category of support structure that can carry different utility services, including electricity and telecommunications. An electrical pole is primarily associated with supporting electrical distribution or related electrical infrastructure.
Are steel poles better than concrete poles?
Steel and concrete poles have different properties and applications. Steel generally offers high strength and design flexibility, while concrete provides durability and resistance to several environmental factors. The suitable option depends on the project’s load, environment, installation, maintenance, and design requirements.
Grades of Corrosion-Resistant Stainless Steel: A Quick Guide 2026
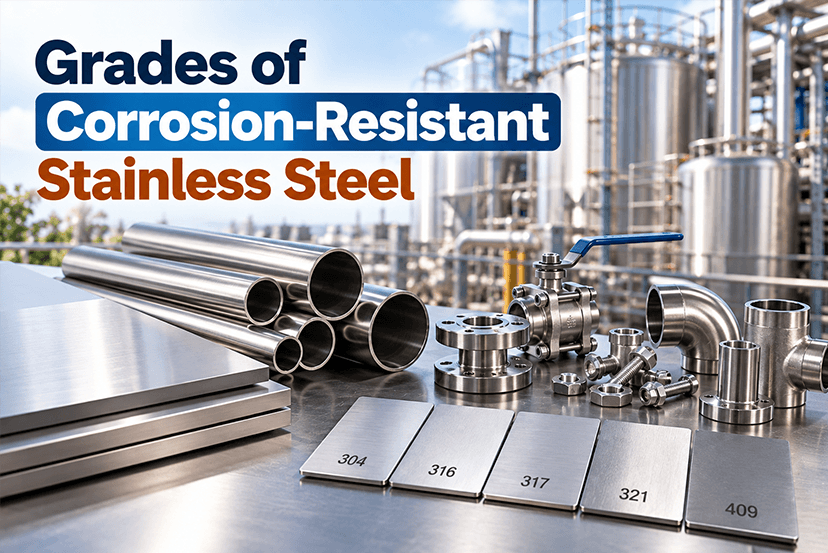
Grades of Corrosion-Resistant Stainless Steel: A Quick Guide 2026
Stainless steel is widely used across construction, manufacturing, food processing, chemical processing, automotive, marine, and industrial applications because of its strength, durability, and resistance to corrosion. However, not all stainless steel grades offer the same level of corrosion resistance. The right grade depends on factors such as exposure to moisture, chemicals, salt, temperature, and mechanical stress.
Understanding the different corrosion-resistant stainless steel grades can help businesses, engineers, and buyers select the right material for their specific application. Popular options such as 304 stainless steel, 316 stainless steel, 321 stainless steel, 904L stainless steel, and duplex stainless steel offer different combinations of corrosion resistance, strength, temperature performance, and cost. If you are looking to procure various grades of stainless steel at wholesale prices, you can simply raise RFQs at Moglix Business and get the best prices.
This guide explains the major grades of corrosion-resistant stainless steel, their properties, applications, and how to choose the right grade.
What Is Corrosion-Resistant Stainless Steel?
Corrosion-resistant stainless steel is an iron-based alloy containing a minimum of about 10.5% chromium. Chromium reacts with oxygen to form a thin, passive oxide layer on the surface of the steel. This layer helps protect the underlying metal from rust and corrosion.
The corrosion resistance of stainless steel can be further improved by adding elements such as nickel, molybdenum, nitrogen, and titanium. Different combinations of these alloying elements create different stainless steel grades suitable for specific environments.
For example, 304 stainless steel is widely used for general-purpose corrosion resistance, while 316 stainless steel contains molybdenum and generally provides better resistance to chlorides and marine environments.
Why Do Stainless Steel Grades Differ in Corrosion Resistance?
The chemical composition and microstructure of stainless steel largely determine its corrosion resistance. Important alloying elements include:
- Chromium: Creates the passive protective layer that provides basic corrosion resistance.
- Nickel: Improves corrosion resistance, toughness, and formability.
- Molybdenum: Improves resistance to pitting and crevice corrosion, particularly in chloride-containing environments.
- Nitrogen: Can improve strength and resistance to certain forms of corrosion.
- Titanium: Helps stabilise certain grades and reduces the risk of sensitisation during high-temperature exposure.
Therefore, choosing a stainless steel grade should be based on the actual operating environment rather than corrosion resistance alone.
List of Common Corrosion-Resistant Stainless Steel Grades
1. 304 Stainless Steel
304 stainless steel is one of the most commonly used stainless steel grades. It generally contains chromium and nickel and provides good resistance to atmospheric corrosion, moisture, and many common chemicals.
It offers a useful combination of corrosion resistance, strength, weldability, formability, and relatively easy fabrication.
Key Features
- Good general corrosion resistance
- Excellent formability
- Good weldability
- Suitable for indoor and outdoor applications
- Easy to fabricate and maintain
Common Applications
304 stainless steel is commonly used for:
- Food processing equipment
- Kitchen equipment
- Storage tanks
- Pipes and fittings
- Fasteners
- Architectural applications
- Industrial equipment
For many general-purpose applications, 304 stainless steel is a practical corrosion-resistant material choice.
2. 316 Stainless Steel
316 stainless steel is a widely used corrosion-resistant grade when greater resistance to chlorides and aggressive environments is required. Its molybdenum content improves resistance to pitting and crevice corrosion compared with standard 304 stainless steel.
It is particularly useful in marine, chemical processing, pharmaceutical, and food-processing environments where exposure to corrosive substances may be higher.
Key Features
- High corrosion resistance
- Improved chloride resistance
- Good resistance to pitting
- Excellent weldability
- Good strength and durability
Common Applications
316 stainless steel is often used for:
- Marine equipment
- Chemical processing equipment
- Pharmaceutical equipment
- Food-processing machinery
- Heat exchangers
- Pumps and valves
- Outdoor industrial equipment
When selecting stainless steel for marine or chloride-rich environments, 316 is often considered because of its molybdenum addition.
3. 321 Stainless Steel
321 stainless steel is a titanium-stabilised austenitic stainless steel grade designed for applications involving elevated temperatures. Titanium helps reduce the risk of chromium carbide precipitation during heating and welding.
It combines corrosion resistance with good high-temperature performance.
Key Features
- Good corrosion resistance
- Excellent high-temperature performance
- Good weldability
- Resistant to intergranular corrosion after exposure to certain elevated temperatures
- Good mechanical properties
Common Applications
321 stainless steel is commonly used in:
- Aircraft components
- Exhaust systems
- Heat exchangers
- High-temperature processing equipment
- Chemical processing equipment
- Expansion joints
It is particularly useful where stainless steel components must withstand repeated or prolonged exposure to elevated temperatures.
4. 347 Stainless Steel
347 stainless steel is another stabilised austenitic grade. It uses niobium to improve resistance to intergranular corrosion following exposure to elevated temperatures.
It is suitable for applications where components experience high temperatures and require good corrosion resistance.
Common Applications
- Aerospace components
- Chemical processing equipment
- High-temperature piping
- Heat exchangers
- Industrial equipment
The choice between 321 and 347 stainless steel depends on the operating conditions, fabrication requirements, temperature exposure, and engineering specifications.
5. 904L Stainless Steel
904L stainless steel is a highly alloyed austenitic stainless steel designed for demanding corrosive environments. It contains relatively high levels of nickel, chromium, molybdenum, and copper.
These alloying elements provide strong resistance to several forms of corrosion, including corrosion in highly acidic environments.
Key Features
- Very high corrosion resistance
- Strong resistance to pitting and crevice corrosion
- Good resistance to sulfuric acid environments
- Good weldability
- Suitable for demanding chemical applications
Common Applications
904L stainless steel can be used in:
- Chemical processing
- Pharmaceutical equipment
- Acid-handling systems
- Heat exchangers
- Pollution-control equipment
- Industrial processing equipment
Because of its higher alloy content, 904L is generally selected for specialised applications where standard stainless steel grades may not provide sufficient corrosion resistance.
Duplex Stainless Steel
Duplex stainless steel combines characteristics of austenitic and ferritic stainless steels. Its mixed microstructure provides a combination of high strength and good corrosion resistance.
Duplex grades are particularly useful when applications require both mechanical strength and resistance to chloride-induced corrosion.
Key Features
- High mechanical strength
- Good resistance to chloride environments
- Good resistance to stress corrosion cracking
- Good resistance to pitting and crevice corrosion
- Suitable for demanding industrial applications
Common Applications
Duplex stainless steel is used in:
- Oil and gas equipment
- Chemical processing
- Marine applications
- Pressure vessels
- Heat exchangers
- Desalination equipment
- Industrial piping systems
Common duplex grades include 2205 duplex stainless steel and higher-alloyed super duplex grades.
Comparison of Popular Corrosion-Resistant Stainless Steel Grades
- 304 Stainless Steel: Best suited for general-purpose applications where good corrosion resistance, formability, and weldability are required.
- 316 Stainless Steel: Suitable for environments with greater exposure to chlorides, moisture, and marine conditions.
- 321 Stainless Steel: Useful for high-temperature applications where stabilisation against sensitisation is important.
- 347 Stainless Steel: Suitable for high-temperature applications requiring resistance to intergranular corrosion.
- 904L Stainless Steel: Designed for highly corrosive and chemically demanding environments.
- Duplex Stainless Steel: Suitable for applications requiring high strength along with strong resistance to chloride-related corrosion.
How to Choose the Right Corrosion-Resistant Stainless Steel Grade?
Selecting a stainless steel grade requires more than simply choosing the grade with the highest corrosion resistance. Consider the complete operating environment and application requirements.
1. Identify the Corrosive Environment
Determine whether the material will be exposed to:
- Fresh water
- Salt water
- Chlorides
- Acids
- Alkalis
- Industrial chemicals
- High humidity
- Atmospheric pollutants
The more aggressive the environment, the more important grade selection becomes.
2. Consider Operating Temperature
Temperature can influence both corrosion behaviour and mechanical properties. For high-temperature applications, grades such as 321 and 347 may be considered depending on the specific conditions.
3. Check Mechanical Requirements
Strength, hardness, toughness, pressure resistance, and fatigue performance should also be evaluated. Duplex stainless steels may be suitable where high strength is a major requirement.
4. Consider Welding and Fabrication
If the material needs extensive welding, bending, machining, or forming, choose a grade that meets the fabrication requirements. Austenitic stainless steels such as 304 and 316 are widely used because of their good fabrication characteristics.
5. Evaluate Cost and Service Life
A higher-alloy stainless steel grade can cost more initially, but the appropriate material may reduce maintenance, replacement, and downtime costs in demanding environments.
The goal should be to select the right stainless steel grade for the application, rather than simply choosing the most corrosion-resistant option.
Benefits of Using Corrosion-Resistant Stainless Steel
Using an appropriate corrosion-resistant stainless steel grade can provide several benefits:
- Long service life: Stainless steel can remain functional for extended periods when correctly selected and maintained.
- Lower maintenance: Resistance to corrosion can reduce frequent repair and replacement requirements.
- Good hygiene: Smooth stainless steel surfaces are widely used in food, pharmaceutical, and sanitary applications.
- High strength: Several stainless steel grades offer strong mechanical performance.
- Good fabrication: Many grades can be welded, formed, machined, and fabricated for industrial applications.
- Aesthetic appearance: Stainless steel offers a clean metallic finish for architectural and consumer applications.
- Recyclability: Stainless steel can be recycled at the end of its useful life.
Final Thoughts
Choosing the right corrosion-resistant stainless steel grade is important for improving equipment durability, reducing maintenance requirements, and achieving reliable performance in demanding environments. Grades such as 304, 316, 321, 347, 904L, and duplex stainless steel offer different combinations of corrosion resistance, strength, temperature performance, and fabrication characteristics.
Before purchasing stainless steel, evaluate the operating environment, chemical exposure, temperature, mechanical requirements, welding needs, and expected service life. Selecting the right grade based on these factors can help ensure better performance and long-term value.
Frequently Asked Questions
Which stainless steel grade has the best corrosion resistance?
The most suitable high-corrosion-resistance grade depends on the environment. Highly alloyed grades such as 904L and super duplex stainless steels are designed for demanding conditions, while 316 is commonly selected for many chloride-exposed applications.
Is 304 stainless steel corrosion resistant?
Yes. 304 stainless steel provides good resistance to many atmospheric and common corrosive environments and is widely used for general-purpose applications.
Is 316 stainless steel better than 304 for corrosion resistance?
316 generally provides better resistance to pitting and crevice corrosion in chloride-containing environments because it contains molybdenum. However, the appropriate grade depends on the specific application.
Which stainless steel is suitable for marine applications?
316 stainless steel is commonly used in marine environments because of its improved resistance to chloride-related corrosion. More demanding marine applications may require duplex or super duplex grades.
Does stainless steel completely prevent rust?
No. Stainless steel is corrosion resistant rather than completely corrosion-proof. Under certain conditions, including aggressive chemical exposure, high chloride concentrations, contamination, or poor maintenance, corrosion can occur.
How To Install a Ceiling Fan: 10 Easy Steps
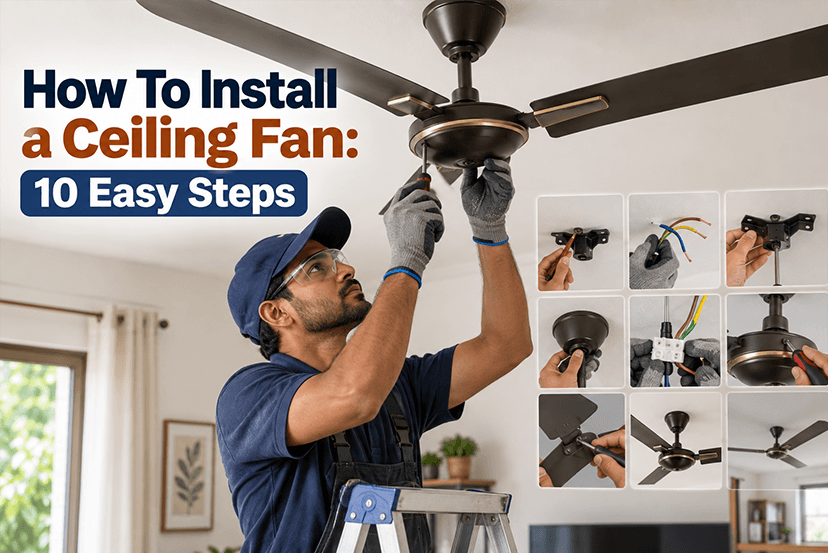
How To Install a Ceiling Fan: 10 Easy Steps
Installing a ceiling fan can improve air circulation, enhance comfort, and help maintain a pleasant indoor temperature. Whether you are replacing an old fan or installing a new one, the process involves more than simply mounting the fan and connecting the wires. Proper installation ensures that the ceiling fan operates smoothly, remains stable, and is safe to use.
If you are wondering how to install a ceiling fan, this step-by-step guide explains the process in simple terms. From switching off the power supply to testing the fan after installation, here are 10 easy steps to install a ceiling fan safely and correctly.
Safety Note: Electrical work can be hazardous. If you are unfamiliar with household wiring or are unsure about any step, have a qualified electrician perform or inspect the installation. Always follow the ceiling fan manufacturer’s installation instructions.
Also read: Top 10 Solar CCTV Cameras in India 2026 With WiFi and SIM
What You Need Before Installing a Ceiling Fan
Before starting, keep the following tools and materials ready:
- Screwdriver set
- Drill machine and suitable drill bits
- Wrench or spanner
- Pliers
- Voltage tester or multimeter
- Measuring tape
- Ladder
- Insulation tape
- Appropriate screws, anchors, and mounting hardware
- Ceiling fan installation kit
- Safety gloves and protective eyewear
Also check that the ceiling fan, downrod, canopy, mounting bracket, blades, screws, wiring, and other components supplied with the product are available before beginning the installation.
How To Install a Ceiling Fan in 10 Easy Steps
1. Switch Off the Main Power Supply
The first and most important step is to turn off the electrical supply to the circuit where the ceiling fan will be installed. Do not rely only on the wall switch. Turn off the appropriate circuit breaker or main supply and use a voltage tester to confirm that there is no live voltage at the installation point. This step helps reduce the risk of electric shock while handling the wiring.
2. Select the Right Installation Location
Choose a suitable location for the ceiling fan, preferably near the centre of the room, so that air can circulate evenly. Check the ceiling structure and ensure that the selected point can support the weight and movement of the fan.
Avoid installing the fan too close to walls, cabinets, lights, or other obstructions. There should also be sufficient clearance between the blades and the ceiling and floor.
3. Install or Check the Ceiling Electrical Box
A standard light-fixture box may not always be suitable for a ceiling fan. Fans create movement and vibration, so the mounting box or support structure must be designed to handle the fan’s weight and dynamic load.
If you are replacing an existing ceiling fan, inspect the existing mounting arrangement for looseness or damage. For a new installation, use a fan-rated electrical box or an appropriate structural support system as recommended by the manufacturer.
4. Fix the Mounting Bracket
Once the power is safely switched off and the mounting point is ready, attach the ceiling fan’s mounting bracket to the electrical box or structural support.
Tighten all screws securely and make sure the bracket does not move. A loose mounting bracket can cause vibration, noise, or instability when the fan is operating.
5. Assemble the Ceiling Fan Motor and Downrod
If your fan model uses a downrod, connect the downrod to the motor assembly according to the manufacturer’s instructions. Pass the electrical wires through the downrod and secure the connection using the supplied hardware.
The canopy can generally be positioned around the upper part of the downrod to cover the electrical connections and mounting hardware later. For flush-mount ceiling fans, the assembly method may differ because the motor is attached closer to the ceiling.
6. Connect the Ceiling Fan Wiring
Now connect the fan’s wires to the corresponding supply wires as specified in the manufacturer’s wiring diagram. Typically, the connections involve live, neutral, and earth/ground, but wire colours and configurations can vary by product and installation.
Use suitable connectors and ensure that no bare conductor is exposed after making the connections. Do not guess wire functions based only on colour; verify them according to the wiring diagram and local electrical requirements. If the wiring is unclear, stop and contact a qualified electrician.
7. Attach the Fan Motor to the Mounting Bracket
Carefully lift the assembled fan and secure the motor or hanger assembly to the mounting bracket. Depending on the model, the fan may use a hook, slot, pin, or other hanging mechanism.
Make sure the fan is properly seated and that all safety screws, locking pins, or retaining mechanisms supplied with the fan are installed correctly.
8. Install the Ceiling Fan Blades
Attach each blade to its blade holder using the supplied screws and washers. Tighten the screws evenly and check that every blade is firmly secured.
Install all blades in the correct orientation. Incorrect blade installation can affect airflow and may cause unnecessary vibration. For fans with multiple blade components, follow the manufacturer’s assembly sequence rather than forcing components into place.
9. Secure the Canopy and Check the Installation
Once the electrical connections and motor assembly are complete, carefully position and secure the canopy against the ceiling. The canopy should cover the mounting hardware and wiring without pinching any wires.
Before switching on the power, manually check the fan for loose screws, unstable components, or obstructions. Make sure the blades have adequate clearance from nearby objects.
10. Restore Power and Test the Ceiling Fan
Turn the circuit breaker back on and operate the fan using the wall switch, regulator, remote, or control system provided with the model.
Start at the lowest speed and check whether the fan runs smoothly. Listen for unusual sounds and observe whether there is excessive wobbling or vibration. Test different speed settings and, if applicable, the light and reverse functions.
If the fan vibrates excessively, makes unusual noises, or does not operate correctly, switch it off and inspect the installation before continuing to use it.
Common Mistakes To Avoid When Installing a Ceiling Fan
Knowing how to install a ceiling fan is only part of the process. Avoiding common installation mistakes is equally important.
- Using an unsuitable electrical box: A regular light fixture box may not provide adequate support.
- Leaving screws loose: Loose blade or mounting screws can lead to vibration and noise.
- Incorrect wiring: Always follow the manufacturer’s wiring diagram.
- Ignoring blade clearance: Ensure sufficient space around the rotating blades.
- Skipping the power check: Always verify that the circuit is de-energised before handling wiring.
- Installing blades incorrectly: Follow the correct blade orientation and assembly sequence.
- Ignoring wobbling: Persistent wobbling can indicate an installation, mounting, or balancing issue.
- Overlooking the manufacturer’s instructions: Different ceiling fan models can have different mounting and wiring requirements.
How To Choose a Ceiling Fan Before Installation
If you are installing a new fan, consider more than just its appearance. The room size, ceiling height, motor type, blade span, speed settings, airflow, energy efficiency, control options, and installation method can influence your choice.
For bedrooms and living rooms, choose a model that provides comfortable airflow with low operating noise. For larger spaces, consider a fan with an appropriate blade span and airflow capacity. If the ceiling is unusually high, a suitable downrod may be required.
Energy-efficient ceiling fans can also help provide effective air circulation while keeping electricity consumption under control.
How High Should a Ceiling Fan Be Installed?
The ideal installation height depends on the ceiling height and fan design. As a general safety principle, the fan should have adequate clearance from the floor and surrounding objects, while maintaining sufficient space between the blades and ceiling.
For high ceilings, a downrod can help position the fan at a more suitable height. Always follow the manufacturer’s recommended clearances and applicable local electrical and building requirements.
Can You Install a Ceiling Fan Yourself?
A mechanically straightforward ceiling fan installation may be manageable for someone experienced with electrical and DIY work. However, connecting a ceiling fan to household electrical wiring can present a shock and fire risk if done incorrectly.
If you are unsure about electrical connections, ceiling support, grounding, circuit capacity, or local requirements, it is safer to hire a qualified electrician.
Where To Buy a Ceiling Fan Online?
Once you know how to install a ceiling fan, the next step is choosing the right model for your room and application. You can compare ceiling fans based on motor technology, blade size, speed, airflow, power consumption, design, control options, warranty, and price before making a purchase.
For residential, commercial, and other applications, online B2B platforms such as Moglix Business can help buyers explore different electrical and home-improvement products in bulk at wholesale prices and compare specifications before procurement.
Final Thoughts
Learning how to install a ceiling fan becomes easier when the process is broken into clear steps. Start by switching off the power, prepare a suitable mounting point, secure the bracket, assemble the fan, connect the wiring correctly, install the blades, and thoroughly test the unit before regular use.
A properly installed ceiling fan can provide consistent airflow, improve indoor comfort, and operate more smoothly. However, because electrical connections and ceiling support are safety-critical, professional installation is recommended whenever you are uncertain about the work.
FAQs
1. Can I install a ceiling fan where a light fixture was installed?
Not always. The existing electrical box must be suitable for supporting a ceiling fan. A fan-rated box or adequate structural support may be required.
2. How long does it take to install a ceiling fan?
The time depends on the existing wiring, mounting support, fan design, and installer experience. Replacing an existing fan can generally be simpler than creating a completely new installation point.
3. Why does my ceiling fan wobble after installation?
Wobbling can result from loose screws, incorrectly installed blades, an unsuitable mounting surface, blade imbalance, or other mechanical issues. Switch the fan off and inspect the installation.
4. Can I install a ceiling fan on a high ceiling?
Yes. A suitable downrod can be used with compatible ceiling fans to position the fan appropriately. Always follow the manufacturer’s recommended installation requirements.
5. Why is my ceiling fan making noise?
Noise can be caused by loose components, blade imbalance, mounting issues, or normal operating characteristics of the particular fan. Check all accessible fasteners and follow the manufacturer’s troubleshooting instructions.
Solar Fencing For Agriculture: Features, Price And Specifications

Solar Fencing For Agriculture: Features, Price And Specifications
Protecting agricultural land from stray animals, wild animals, and unauthorised entry is an important concern for farmers and landowners. Traditional fencing can require significant installation and maintenance, while a solar fencing system offers an energy-efficient alternative for securing farms, orchards, nurseries, and plantations. Businesses and industries looking for top-quality and complete solar fencing components can procure them at Moglix Business.
A solar fence uses solar energy to power an energiser that generates controlled electric pulses through fencing wires. When an animal or intruder touches the fence, the pulse acts as a deterrent without continuously supplying electricity. This makes solar fencing for agriculture useful for farms located in remote areas where access to grid electricity may be limited.
Also read: Types Of Solar Power Plants in India: A Complete Guide 2026
What Is Solar Fencing?
A solar fencing system is an electric fence powered by a solar panel and battery. The system generally consists of a solar panel, rechargeable battery, solar fence energiser, fencing wire, insulators, poles and other installation accessories.
The solar panel charges the battery during the day, while the stored energy powers the energiser. The energiser converts this energy into high-voltage, short-duration pulses that travel through the fence wire. These pulses are designed to deter animals and intruders rather than provide continuous electrical current.
For agricultural applications, the system can be installed around the perimeter of farms, vegetable fields, orchards, vineyards, plantations, and other agricultural properties.
How Does a Solar Fence Work?
A typical solar fence works through the following process:
- Solar panel captures sunlight: The panel converts sunlight into electrical energy.
- Battery stores energy: The generated electricity is stored in a rechargeable battery.
- Energiser generates pulses: The solar fence energiser converts stored energy into controlled high-voltage pulses.
- Fence wire carries the pulse: The pulse travels along the conductive fencing wire.
- Contact triggers a deterrent: When an animal or intruder touches the fence and completes the circuit, the pulse creates a deterrent effect.
- System continues operating: The battery allows the fence to function during periods of low sunlight or at night, depending on system capacity.
Key Features of the Best Solar Fencing for Agriculture
When selecting a solar fence for farms, consider the following features:
1. Solar-Powered Operation: Solar-powered fencing reduces dependence on conventional electricity and can be suitable for farms in remote or off-grid locations. A properly sized solar panel and battery help maintain operation according to the site’s energy requirements.
2. High-Voltage Pulsed Output: The energiser generates controlled pulses rather than continuous current. The output should be selected according to the fence length, vegetation conditions and type of animal that needs to be deterred.
3. Rechargeable Battery: The battery stores solar energy for use when sunlight is unavailable. Battery capacity is an important specification because it affects how long the system can operate during cloudy weather or at night.
4. Long Fence Coverage: Different energisers are designed for different fence lengths. Before purchasing, check the manufacturer’s recommended fence coverage and consider terrain, vegetation and the number of wires being installed.
5. Low Maintenance: Solar fencing generally requires periodic inspection of wires, insulators, vegetation, and battery condition. Keeping vegetation away from the wires can help maintain effective operation.
6. Weather-Resistant Construction: Agricultural fences remain exposed to rain, dust, sunlight and temperature changes. Choose components with suitable weather-resistant construction for outdoor installation.
7. Battery Backup: A battery backup allows the system to continue functioning after sunset. The required backup duration depends on the battery capacity, energiser consumption and solar charging conditions.
8. Easy Installation: A complete solar fence setup should accommodate poles, insulators, wires, earthing arrangements, and the energiser. Installation should follow the manufacturer’s specifications and applicable local safety requirements.
Also read: Top 10 Solar Water Pump Manufacturers in India 2026
Solar Fencing Specifications to Check Before Buying
The specifications of a solar fencing system vary by manufacturer and application. The most important parameters include:
| Specification | What to Check |
| Power source | Solar panel + rechargeable battery |
| Energiser | Output pulse and energy rating |
| Fence length | Maximum recommended coverage |
| Battery | Voltage, Ah capacity and backup |
| Solar panel | Wattage and charging capacity |
| Fence wire | Material, gauge and conductivity |
| Number of wires | Based on application and perimeter |
| Earthing | Number and type of earth electrodes |
| Insulators | Outdoor/weather-resistant construction |
| Protection | Short-circuit and overload protection, where provided |
| Enclosure | Outdoor/weather-resistant rating |
| Operating conditions | Suitable temperature and environmental range |
Indicative Solar Fencing Price for Agriculture
The solar fencing price depends on several factors, including fence length, energiser capacity, solar panel wattage, battery capacity, number of wires, poles, insulators, and installation requirements. For a small agricultural plot, the overall cost may be lower because fewer fencing materials and a smaller energiser are required. Larger farms, orchards and plantations generally require longer fencing, additional poles and more powerful system components.
Instead of comparing only the price of the energiser, buyers should consider the total solar fencing cost, including the solar panel, battery, fencing wire, poles, insulators, earthing materials and installation.
Note: Solar fencing prices can vary significantly by specifications, brand, fence length, and installation requirements. Check the latest product price and configuration before purchase.
Factors Affecting Solar Fencing Cost
Several factors influence the final cost of a solar fencing system:
- Total perimeter: A larger farm requires more wire, poles, and insulators.
- Energiser capacity: Higher-capacity energisers may cost more.
- Solar panel size: Larger panels can be required for higher energy requirements.
- Battery capacity: A higher Ah battery generally provides greater energy storage.
- Fence configuration: The number and spacing of wires affect material requirements.
- Terrain: Uneven or difficult terrain can increase installation complexity.
- Animal type: The required fence configuration can vary depending on whether the objective is to deter cattle, wild boars, deer, or other animals.
- Installation: Labour and earthing requirements can add to the overall project cost.
Benefits of Solar Fencing for Agriculture
A properly designed solar fencing system can provide several practical advantages:
- Uses renewable solar energy
- Suitable for remote and off-grid agricultural locations
- Provides perimeter deterrence
- Can operate after sunset with battery storage
- Requires relatively low routine maintenance
- Can be configured for different farm sizes
- Helps protect crops and agricultural property
- Can be integrated with existing physical fencing
- Reduces dependence on grid electricity
Tips for Maintaining a Solar Fence
Regular maintenance helps keep the fencing system operating effectively.
- Inspect fence wires: Check for broken, loose, or damaged wires.
- Remove vegetation: Grass, branches, and weeds touching the fence can reduce performance and cause unnecessary energy loss.
- Check the battery: Inspect battery condition and charging performance periodically.
- Clean the solar panel: Dust and dirt can reduce solar energy generation.
- Inspect insulators: Damaged or cracked insulators should be replaced.
- Check earthing: Ensure the earthing system remains properly installed and free from damage.
- Inspect the energiser: Check the energiser and connections according to the manufacturer’s maintenance recommendations.
Also read: Top 10 Solar CCTV Cameras in India 2026 With WiFi and SIM
Conclusion
Choosing the best solar fencing for agriculture requires more than comparing prices. Farmers should evaluate the fence length, energiser output, solar panel capacity, battery backup, fencing wire, number of wires, earthing arrangement, and environmental conditions. A properly designed solar fence system can provide a practical, solar-powered perimeter deterrent for farms, orchards, plantations and other agricultural properties.
When comparing solar fencing prices, consider the complete system cost rather than the energiser alone. Selecting components according to the farm’s perimeter and protection requirements can help create a reliable and maintainable fencing solution.
Frequently Asked Questions
What is solar fencing for agriculture?
Solar fencing is an electric perimeter fencing system powered by solar energy. It uses an energiser to deliver controlled pulses through fence wires to deter animals and unauthorised entry.
Is solar fencing suitable for farms?
Yes, solar fencing can be suitable for farms, orchards, plantations and other agricultural properties, particularly where grid electricity is unavailable or unreliable.
What is the price of solar fencing?
Solar fencing price depends on the fence length, energiser capacity, solar panel, battery, fencing wire, poles, insulators, and installation requirements.
How long does a solar fence battery last?
Battery backup depends on its capacity, energiser consumption, solar charging conditions and system usage. Check the manufacturer’s rated backup and battery specifications.
Does solar fencing work at night?
Yes. A solar fence can operate at night when its battery stores sufficient energy generated during the day.
Which CCTV Camera Is Best for Home 2026: Specifications, Use Cases, and Prices
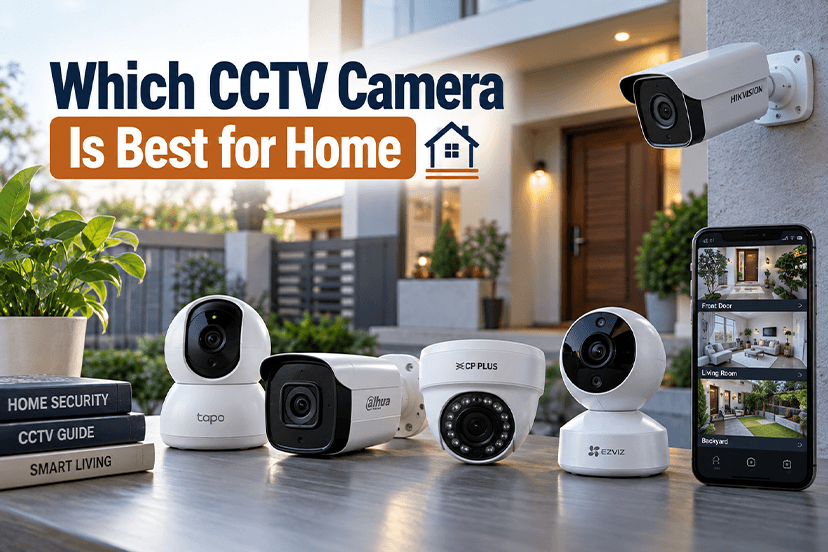
Which CCTV Camera Is Best for Home 2026: Specifications, Use Cases, and Prices
Choosing the right CCTV camera for home security depends on more than just image quality. Factors such as camera type, resolution, night vision, storage, viewing angle, connectivity, motion detection, weather resistance, and installation requirements all affect how effectively a security camera protects your home.
Whether you want to monitor your main entrance, balcony, parking area, living room, backyard, or an entire house, there are several CCTV camera options available for different security requirements and budgets. Modern home CCTV cameras also offer features such as Wi-Fi connectivity, two-way audio, mobile app monitoring, AI-based human detection, colour night vision, and cloud storage. Businesses and industries looking to purchase CCTV cameras in bulk for large industries, retail buildings, and offices can procure through Moglix Business. We are India’s largest B2B procurement platform offering a wide range of CCTV cameras in bulk.
This guide explains which CCTV camera is best for home, its key specifications, use cases, expected CCTV camera prices, and the important factors to consider before buying one.
Which CCTV Camera Is Best for Home?
The best CCTV camera for home depends on where you want to install it and what you need to monitor. For basic indoor monitoring, a Wi-Fi indoor CCTV camera with 2MP or 3MP resolution can be a practical choice. For entrances, driveways, balconies, and outdoor areas, an outdoor CCTV camera with weather resistance, infrared night vision, and a wider viewing angle is generally more suitable.
For homes requiring flexible coverage, PTZ cameras can provide pan, tilt, and zoom functionality, while smart CCTV cameras with motion and human detection can send alerts directly to a smartphone.
Also read: Top 10 Solar CCTV Cameras in India 2026 With WiFi and SIM
| CCTV Camera Type | Best For | Typical Resolution | Key Features |
| Indoor Wi-Fi Camera | Living rooms, bedrooms, hallways | 2MP–4MP | Wi-Fi, mobile monitoring, two-way audio |
| Outdoor Bullet Camera | Gates, driveways, parking | 2MP–8MP | Night vision, weather resistance |
| Dome Camera | Entrances and indoor areas | 2MP–8MP | Compact design, wide coverage |
| PTZ Camera | Large areas and outdoor spaces | 2MP–8MP+ | Pan, tilt, zoom |
| Smart CCTV Camera | Connected home security | 2MP–4K | AI alerts, app control, motion detection |
| Solar CCTV Camera | Locations without easy wiring | 2MP–4MP | Solar charging, wireless connectivity |
What Are The Various Types Of CCTV Cameras For Home?
Different CCTV camera designs are suited to different locations and security requirements.
1. Wi-Fi CCTV Camera
A Wi-Fi CCTV camera connects to your home’s wireless network and allows you to monitor live footage through a smartphone or computer. It is suitable for apartments, living rooms, entrances, and other locations where running extensive cables may not be convenient.
Look for features such as Full HD resolution, motion detection, night vision, two-way communication, SD card storage, and mobile notifications.
2. Indoor CCTV Camera
Indoor CCTV cameras are designed for monitoring rooms, corridors, staircases, entry points, and other indoor spaces. Many compact models feature 360-degree or pan-and-tilt coverage, making them useful for monitoring larger rooms.
For indoor use, a 2MP or 3MP camera may be sufficient for general monitoring, while higher-resolution models can provide more detailed footage.
3. Outdoor CCTV Camera
Outdoor CCTV cameras are designed to withstand environmental conditions such as rain, dust, heat, and humidity. They are commonly installed near main gates, parking spaces, balconies, entrances, terraces, and backyards.
When buying an outdoor camera, check its IP rating, night vision range, viewing angle, resolution, and operating temperature range.
4. Bullet CCTV Camera
Bullet cameras have a long, cylindrical design and are commonly installed on walls, gates, and outdoor areas. Their directional design makes them suitable for monitoring a specific area such as a driveway or entrance.
5. Dome CCTV Camera
Dome cameras have a compact, rounded design and are commonly used indoors or in semi-covered outdoor locations. Their appearance can make them suitable for homes where a discreet security camera is preferred.
6. PTZ CCTV Camera
PTZ stands for Pan-Tilt-Zoom. These cameras can move horizontally and vertically and zoom into specific areas. They are useful when one camera needs to cover a relatively large area.
7. Solar CCTV Camera
Solar CCTV cameras use solar panels to recharge their batteries. They can be useful for remote outdoor locations where connecting the camera to a conventional power supply is difficult.
Also read: Top 10 best CCTV Camera Manufacturers in India 2026
Important Specifications To Check Before Buying A Home CCTV Camera
Understanding CCTV camera specifications can help you select a model that matches your security requirements.
Resolution
Resolution determines how much detail the camera can capture. Common options include:
- 2MP: Suitable for basic Full HD monitoring
- 3MP–4MP: Better detail for entrances and general surveillance
- 5MP–8MP: Suitable when greater image detail is required
- 4K: High-detail monitoring for demanding applications
For most homes, 2MP to 5MP CCTV cameras can provide a practical balance between image quality, storage requirements, and price.
Night Vision
Night vision is essential if the camera needs to operate after dark. Infrared LEDs allow cameras to capture footage in low-light conditions.
When comparing cameras, check the night vision range rather than simply looking for a “night vision” label. Some advanced models also offer colour night vision for improved identification in suitable lighting conditions.
Field of View
The field of view determines how much area a camera can see. A wide-angle camera can cover more space, while a narrower field of view can provide more focused monitoring.
For a main entrance or corridor, a moderate field of view may be sufficient. Larger areas such as gardens and parking spaces may benefit from wider coverage or multiple cameras.
Motion Detection
Motion detection enables the camera to identify movement and trigger recording or notifications. Advanced cameras can distinguish between people and general movement, helping reduce unnecessary alerts.
Two-Way Audio
Two-way audio allows you to listen to the monitored area and communicate through the camera using a built-in microphone and speaker. This can be useful for communicating with family members, visitors, delivery personnel, or security staff.
Storage
CCTV footage can be stored using:
- MicroSD cards
- Network video recorders (NVRs)
- Digital video recorders (DVRs)
- Cloud storage
Your choice depends on the camera type, recording duration, number of cameras, and preferred access method.
Connectivity
Home CCTV cameras may use Wi-Fi, Ethernet, or wired coaxial connections depending on the camera and surveillance system.
Wi-Fi cameras are convenient for many residential applications, while wired systems can be preferable where stable connectivity and continuous surveillance are priorities.
Weather Resistance
Outdoor cameras should have an appropriate IP rating to protect against dust and water. A higher IP rating generally provides better environmental protection.
Smart Detection
Modern smart CCTV cameras can offer features such as:
- Human detection
- Vehicle detection
- Motion tracking
- Intrusion alerts
- Activity notifications
- Privacy zones
These features can make home surveillance more intelligent and reduce unnecessary alerts.
CCTV Camera Use Cases for Different Areas of Your Home
The ideal CCTV camera can vary depending on the installation location.
Main Entrance: Install a CCTV camera near the main entrance to monitor visitors and deliveries. A camera with good resolution, wide-angle coverage, night vision, and motion detection is recommended.
Parking Area: For parking spaces, choose an outdoor CCTV camera with night vision and weather resistance. Higher resolution can help capture useful details from a greater distance.
Balcony and Terrace: A compact outdoor or weather-resistant Wi-Fi camera can be suitable for balconies and terraces. Consider cameras with motion detection and smartphone alerts.
Living Room: An indoor Wi-Fi CCTV camera can monitor common indoor areas. Two-way audio and pan-and-tilt functionality can be useful for broader room coverage.
Baby or Elderly Monitoring: For monitoring children or elderly family members, consider an indoor smart camera with two-way audio, night vision, motion alerts, and mobile app access.
Backyard and Side Entrance: Outdoor cameras with weather protection and infrared night vision are suitable for less frequently monitored areas such as backyards and side entrances.
CCTV Camera Price for Residential Purposes
The CCTV camera price varies according to resolution, camera type, brand, connectivity, storage options, night vision, AI features, and installation requirements.
As a broad market guide, individual home CCTV cameras may fall into these approximate price segments:
| CCTV Camera Category | Approximate Price Range |
| Basic Indoor Wi-Fi Camera | ₹1,000–₹2,500 |
| Full HD Smart CCTV Camera | ₹1,500–₹3,500 |
| Outdoor CCTV Camera | ₹1,500–₹5,000 |
| 4MP–5MP Smart Camera | ₹2,500–₹6,000 |
| PTZ CCTV Camera | ₹3,000–₹10,000+ |
| 4K CCTV Camera | ₹5,000–₹15,000+ |
| Multi-Camera CCTV Kit | ₹5,000–₹30,000+ |
These are indicative ranges and can vary based on specifications, brand, offers, storage, accessories, and installation costs.
Final Thoughts
The best CCTV camera for home is one that matches your property’s layout, monitoring requirements, lighting conditions, connectivity, and budget. For basic indoor monitoring, a smart Wi-Fi camera can offer convenient remote access and motion alerts. For outdoor security, prioritise weather resistance, night vision, viewing angle, and reliable connectivity.
Before you buy CCTV cameras online, compare resolution, storage, night vision, motion detection, two-way audio, field of view, and installation requirements rather than choosing solely on price. A well-planned CCTV setup can help you monitor important areas of your home and maintain greater visibility over everyday activity.
Explore a wide range of CCTV cameras, security cameras, surveillance systems, and related accessories on Moglix Business.
Frequently Asked Questions
Which CCTV camera is best for home?
The best CCTV camera for home depends on the installation area and security requirements. A Wi-Fi smart camera is suitable for many indoor applications, while weather-resistant outdoor cameras are better for gates, parking areas, balconies, and entrances.
What is the price of a CCTV camera for home?
Home CCTV camera prices can start at around ₹1,000 for basic models and can exceed ₹10,000 for advanced PTZ or high-resolution cameras. The final price depends on features, brand, storage, and connectivity.
Which is better, Wi-Fi or wired CCTV?
Wi-Fi CCTV cameras offer convenient installation and remote monitoring, while wired systems provide stable connectivity and are often preferred for larger multi-camera setups. The right choice depends on your home and installation requirements.
How long can CCTV cameras record?
Recording duration depends on storage capacity, camera resolution, recording mode, number of cameras, and compression technology. Motion-based recording can extend storage compared with continuous recording.
Do home CCTV cameras work at night?
Yes. CCTV cameras equipped with infrared or other low-light technologies can record footage in dark conditions. Check the manufacturer’s specified night vision range before buying.
Top 10 Ear Muffs and Plugs Manufacturers in India 2026: Prices, Features and Use Cases

Top 10 Ear Muffs and Plugs Manufacturers in India 2026: Prices, Features and Use Cases
Workplace noise can be more than just a distraction. Continuous exposure to loud machinery, construction equipment, compressors, generators, and other industrial sounds can affect hearing and employee safety. This makes hearing protection equipment such as ear muffs and ear plugs an important part of workplace personal protective equipment (PPE). India has several manufacturers and suppliers offering ear muffs, ear plugs, reusable ear plugs, disposable ear plugs, and industrial hearing protection products for different working environments. If you are looking to procure ear plugs and muffs at wholesale prices, then Buinsess Moglix is the one destination to purchase them in bulk.
In this guide, we explore the top 10 ear muffs and ear plugs manufacturers in India in 2026, along with their product features, indicative prices, applications, and factors to consider before purchasing.
What Are Ear Muffs and Ear Plugs?
Ear muffs are hearing protection devices that cover the entire outer ear using cushioned ear cups. They are commonly used in environments where workers are exposed to high and continuous noise levels. Ear plugs are small hearing protection devices inserted into the ear canal to reduce the amount of sound reaching the inner ear. They are available in disposable and reusable designs.
Both products are widely used in industries such as manufacturing, construction, automotive, mining, pharmaceuticals, oil and gas, and infrastructure.
Also Read: Safety Shoes Buying Guide: What Features to Look For Before Ordering in Bulk
Top 10 Ear Muffs and Ear Plugs Manufacturers in India 2026
Here is a list of leading brands and manufacturers known for hearing protection and industrial safety products in India.
| Rank | Manufacturer/Brand | Popular Products | Indicative Price Range* |
| 1 | 3M India | Ear plugs, ear muffs, reusable hearing protection | ₹20–₹2,500 |
| 2 | Honeywell | Ear muffs, disposable and reusable ear plugs | ₹30–₹3,000 |
| 3 | Udyogi | Ear plugs, ear muffs and industrial PPE | ₹20–₹2,000 |
| 4 | Karam | Ear plugs and hearing protection PPE | ₹20–₹1,500 |
| 5 | Venus Safety & Health | Ear plugs, ear muffs and PPE | ₹15–₹1,500 |
| 6 | Mallcom | Ear plugs, ear muffs and safety equipment | ₹20–₹2,000 |
| 7 | Midas Safety | Ear plugs and industrial PPE | ₹20–₹1,500 |
| 8 | Delta Plus | Ear plugs and ear muffs | ₹30–₹2,500 |
| 9 | Hillson | Ear plugs, ear muffs and safety PPE | ₹20–₹1,500 |
| 10 | ESSL | Ear plugs and industrial hearing protection | ₹20–₹1,500 |
*Prices are indicative and may vary based on product type, quantity, specifications, certifications, and supplier.
Comprehensive Elaboration Of Best Ear Plugs And Muffs In India 2026
1. 3M India
3M is one of the widely recognised names in workplace safety and personal protective equipment. Its hearing protection portfolio includes ear plugs and ear muffs designed for industrial and occupational applications.
Key Features
- Disposable and reusable ear plugs
- Over-the-head and other earmuff designs
- Multiple noise reduction options
- Comfortable materials for extended use
- Suitable for industrial environments
Use Cases
3M hearing protection products are commonly used in:
- Manufacturing plants
- Construction sites
- Automotive industries
- Workshops
- Airports
- Heavy machinery operations
Indicative price: ₹20–₹2,500 depending on the product.
2. Honeywell
Honeywell offers a wide range of workplace safety products, including hearing protection equipment. Its product range covers ear plugs and ear muffs suitable for workers exposed to industrial noise.
Key Features
- Ergonomic designs
- Lightweight construction
- Disposable and reusable options
- Adjustable ear muff models
- Suitable for prolonged workplace use
Use Cases
Honeywell hearing protection can be used in:
- Manufacturing
- Construction
- Mining
- Metalworking
- Oil and gas
- Industrial maintenance
Indicative price: ₹30–₹3,000.
3. Udyogi
Udyogi is an Indian safety equipment company offering a broad portfolio of PPE and industrial safety products. Its hearing protection range includes ear plugs and ear muffs for different workplace environments.
Key Features
- Comfortable designs
- Lightweight construction
- Multiple hearing protection options
- Suitable for industrial applications
- Available in different configurations
Use Cases
- Factories
- Construction
- Engineering
- Workshops
- Infrastructure projects
- Manufacturing units
Indicative price: ₹20–₹2,000.
Also Read: Top 10 Best Safety Shoe Brands In India 2026
4. Karam
Karam is an Indian manufacturer of personal protective equipment and safety products. Its portfolio includes hearing protection products designed for workers operating around machinery and other sources of occupational noise.
Key Features
- Ergonomic construction
- Lightweight options
- Easy-to-use designs
- Suitable for industrial environments
- Available in disposable and reusable formats
Use Cases
- Construction sites
- Industrial plants
- Engineering units
- Workshops
- Maintenance operations
Indicative price: ₹20–₹1,500.
5. Venus Safety & Health
Venus Safety & Health manufactures and supplies various types of industrial PPE, including hearing protection products. Its product portfolio is suitable for workplaces where noise exposure is a safety concern.
Key Features
- Ear plugs and ear muffs
- Comfortable fit
- Lightweight designs
- Industrial-grade PPE
- Options for different working conditions
Use Cases
- Manufacturing
- Construction
- Automotive
- Engineering
- Industrial maintenance
Indicative price: ₹15–₹1,500.
6. Mallcom
Mallcom is an Indian PPE manufacturer offering safety equipment for industrial and occupational applications. Its product range includes hearing protection products alongside other workplace safety equipment.
Key Features
- Industrial-grade construction
- Comfortable designs
- Different protection configurations
- Suitable for regular workplace use
- Available for industrial applications
Use Cases
- Factories
- Warehouses
- Construction
- Engineering
- Manufacturing
Indicative price: ₹20–₹2,000.
7. Midas Safety
Midas Safety provides a range of occupational safety equipment, including hearing protection solutions. Its products are designed for workers who need protection against workplace noise.
Key Features
- Disposable and reusable options
- Ergonomic designs
- Lightweight products
- Suitable for industrial use
- Multiple PPE configurations
Use Cases
- Manufacturing facilities
- Construction
- Automotive plants
- Metalworking
- Industrial operations
Indicative price: ₹20–₹1,500.
8. Delta Plus
Delta Plus is a safety equipment brand offering a wide range of PPE products, including ear plugs and ear muffs. Its hearing protection products are designed for various occupational environments.
Key Features
- Comfortable fit
- Adjustable ear muffs
- Reusable and disposable options
- Durable construction
- Suitable for industrial applications
Use Cases
- Construction
- Manufacturing
- Infrastructure
- Workshops
- Heavy industries
Indicative price: ₹30–₹2,500.
9. Hillson
Hillson is an Indian safety footwear and PPE brand with products covering several workplace safety requirements. Its range includes hearing protection equipment for industrial applications.
Key Features
- Cost-effective options
- Lightweight designs
- Easy-to-use products
- Suitable for industrial environments
- Available in different configurations
Use Cases
- Construction
- Factories
- Workshops
- Manufacturing
- Maintenance
Indicative price: ₹20–₹1,500.
10. ESSL
ESSL offers workplace safety equipment and PPE solutions for industrial users. Its hearing protection products can be used in environments where workers are exposed to machinery and operational noise.
Key Features
- Industrial applications
- Comfortable designs
- Lightweight options
- Easy maintenance
- Suitable for routine workplace use
Use Cases
- Engineering
- Manufacturing
- Construction
- Workshops
- Industrial facilities
Indicative price: ₹20–₹1,500.
Ear Muffs vs Ear Plugs: Which One Should You Choose?
Both ear muffs and ear plugs provide hearing protection, but their design and suitability differ.
| Feature | Ear Muffs | Ear Plugs |
| Coverage | Covers the entire ear | Fits inside the ear canal |
| Reusability | Generally reusable | Disposable or reusable |
| Ease of wearing | Easy to put on and remove | Requires correct insertion |
| Portability | Bulkier | Compact |
| Hygiene | Easier to inspect and clean | Requires proper hygiene |
| Compatibility | May interfere with helmets/glasses | Generally compatible with other PPE |
| Best suited for | Intermittent or high-noise exposure | Continuous use and portability |
How to Buy Ear Muffs and Ear Plugs Online in India
Businesses can compare multiple ear muffs and ear plugs online based on specifications, price, brand, and application. When purchasing in bulk, consider:
- Identify the noise level and workplace conditions.
- Select the appropriate type of hearing protection.
- Check noise attenuation specifications.
- Compare product material and comfort.
- Verify compatibility with other PPE.
- Check applicable certifications and standards.
- Compare prices for bulk quantities.
- Choose a reliable supplier.
- Consider replacement and maintenance requirements.
- Train workers on correct usage.
Conclusion
Choosing the right ear muffs and ear plugs is essential for workplaces where employees are exposed to potentially harmful noise. Brands such as 3M, Honeywell, Udyogi, Karam, Venus Safety & Health, Mallcom, Midas Safety, Delta Plus, Hillson, and ESSL offer different hearing protection options for industrial applications. Before purchasing, businesses should evaluate noise exposure, product fit, comfort, noise attenuation, durability, PPE compatibility, certifications, and overall cost.
For businesses looking to buy ear plugs and ear muffs online in India, comparing products from multiple brands and suppliers can help identify the right solution for specific workplace requirements.
Frequently Asked Questions
- Which is better, ear plugs or ear muffs?
Neither is universally better. Ear plugs are compact and convenient, while ear muffs are easier to put on and remove and can be useful for intermittent exposure. The choice depends on noise levels, workplace conditions, comfort, and PPE compatibility.
- What is the price of ear plugs in India?
Basic disposable ear plugs can cost only a few rupees per pair, while reusable and specialised products can cost significantly more. Bulk pricing also varies by brand and quantity.
- What is the price of industrial ear muffs?
Basic industrial ear muffs can start at around ₹150, while premium and specialised models can cost several thousand rupees.
- Can ear plugs and ear muffs be used together?
Yes. In environments with very high noise exposure, organisations may use dual hearing protection where appropriate. The exact approach should be based on a workplace noise assessment and professional safety guidance.
- Where can I buy ear plugs online in India?
You can purchase ear plugs from industrial safety suppliers, authorised distributors and B2B marketplaces. Compare specifications, certifications, noise attenuation, and pricing before buying.
- Which industries use ear muffs and ear plugs?
Common industries include manufacturing, construction, automotive, mining, oil and gas, metalworking, infrastructure, engineering and industrial maintenance.


 Back
Back