
How To Install a Ceiling Fan: 10 Easy Steps
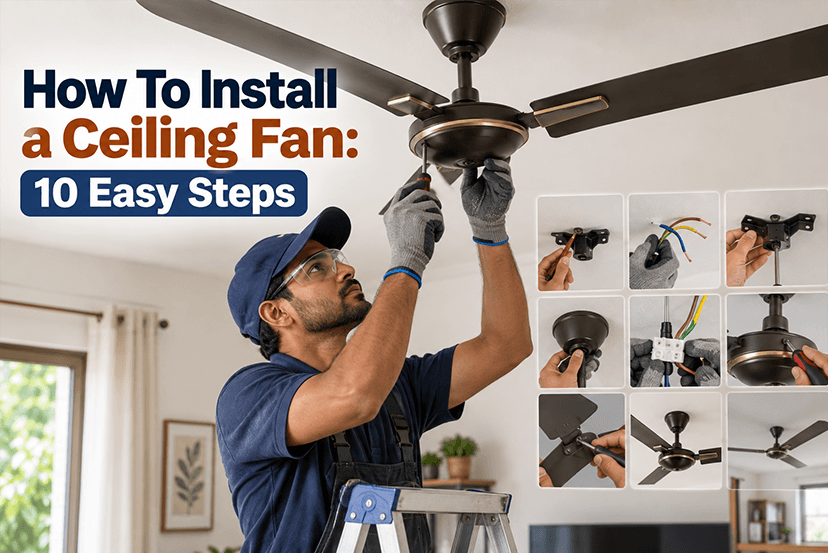
Installing a ceiling fan can improve air circulation, enhance comfort, and help maintain a pleasant indoor temperature. Whether you are replacing an old fan or installing a new one, the process involves more than simply mounting the fan and connecting the wires. Proper installation ensures that the ceiling fan operates smoothly, remains stable, and is safe to use.
If you are wondering how to install a ceiling fan, this step-by-step guide explains the process in simple terms. From switching off the power supply to testing the fan after installation, here are 10 easy steps to install a ceiling fan safely and correctly.
Safety Note: Electrical work can be hazardous. If you are unfamiliar with household wiring or are unsure about any step, have a qualified electrician perform or inspect the installation. Always follow the ceiling fan manufacturer’s installation instructions.
Also read: Top 10 Solar CCTV Cameras in India 2026 With WiFi and SIM
What You Need Before Installing a Ceiling Fan
Before starting, keep the following tools and materials ready:
- Screwdriver set
- Drill machine and suitable drill bits
- Wrench or spanner
- Pliers
- Voltage tester or multimeter
- Measuring tape
- Ladder
- Insulation tape
- Appropriate screws, anchors, and mounting hardware
- Ceiling fan installation kit
- Safety gloves and protective eyewear
Also check that the ceiling fan, downrod, canopy, mounting bracket, blades, screws, wiring, and other components supplied with the product are available before beginning the installation.
How To Install a Ceiling Fan in 10 Easy Steps
1. Switch Off the Main Power Supply
The first and most important step is to turn off the electrical supply to the circuit where the ceiling fan will be installed. Do not rely only on the wall switch. Turn off the appropriate circuit breaker or main supply and use a voltage tester to confirm that there is no live voltage at the installation point. This step helps reduce the risk of electric shock while handling the wiring.
2. Select the Right Installation Location
Choose a suitable location for the ceiling fan, preferably near the centre of the room, so that air can circulate evenly. Check the ceiling structure and ensure that the selected point can support the weight and movement of the fan.
Avoid installing the fan too close to walls, cabinets, lights, or other obstructions. There should also be sufficient clearance between the blades and the ceiling and floor.
3. Install or Check the Ceiling Electrical Box
A standard light-fixture box may not always be suitable for a ceiling fan. Fans create movement and vibration, so the mounting box or support structure must be designed to handle the fan’s weight and dynamic load.
If you are replacing an existing ceiling fan, inspect the existing mounting arrangement for looseness or damage. For a new installation, use a fan-rated electrical box or an appropriate structural support system as recommended by the manufacturer.
4. Fix the Mounting Bracket
Once the power is safely switched off and the mounting point is ready, attach the ceiling fan’s mounting bracket to the electrical box or structural support.
Tighten all screws securely and make sure the bracket does not move. A loose mounting bracket can cause vibration, noise, or instability when the fan is operating.
5. Assemble the Ceiling Fan Motor and Downrod
If your fan model uses a downrod, connect the downrod to the motor assembly according to the manufacturer’s instructions. Pass the electrical wires through the downrod and secure the connection using the supplied hardware.
The canopy can generally be positioned around the upper part of the downrod to cover the electrical connections and mounting hardware later. For flush-mount ceiling fans, the assembly method may differ because the motor is attached closer to the ceiling.
6. Connect the Ceiling Fan Wiring
Now connect the fan’s wires to the corresponding supply wires as specified in the manufacturer’s wiring diagram. Typically, the connections involve live, neutral, and earth/ground, but wire colours and configurations can vary by product and installation.
Use suitable connectors and ensure that no bare conductor is exposed after making the connections. Do not guess wire functions based only on colour; verify them according to the wiring diagram and local electrical requirements. If the wiring is unclear, stop and contact a qualified electrician.
7. Attach the Fan Motor to the Mounting Bracket
Carefully lift the assembled fan and secure the motor or hanger assembly to the mounting bracket. Depending on the model, the fan may use a hook, slot, pin, or other hanging mechanism.
Make sure the fan is properly seated and that all safety screws, locking pins, or retaining mechanisms supplied with the fan are installed correctly.
8. Install the Ceiling Fan Blades
Attach each blade to its blade holder using the supplied screws and washers. Tighten the screws evenly and check that every blade is firmly secured.
Install all blades in the correct orientation. Incorrect blade installation can affect airflow and may cause unnecessary vibration. For fans with multiple blade components, follow the manufacturer’s assembly sequence rather than forcing components into place.
9. Secure the Canopy and Check the Installation
Once the electrical connections and motor assembly are complete, carefully position and secure the canopy against the ceiling. The canopy should cover the mounting hardware and wiring without pinching any wires.
Before switching on the power, manually check the fan for loose screws, unstable components, or obstructions. Make sure the blades have adequate clearance from nearby objects.
10. Restore Power and Test the Ceiling Fan
Turn the circuit breaker back on and operate the fan using the wall switch, regulator, remote, or control system provided with the model.
Start at the lowest speed and check whether the fan runs smoothly. Listen for unusual sounds and observe whether there is excessive wobbling or vibration. Test different speed settings and, if applicable, the light and reverse functions.
If the fan vibrates excessively, makes unusual noises, or does not operate correctly, switch it off and inspect the installation before continuing to use it.
Common Mistakes To Avoid When Installing a Ceiling Fan
Knowing how to install a ceiling fan is only part of the process. Avoiding common installation mistakes is equally important.
- Using an unsuitable electrical box: A regular light fixture box may not provide adequate support.
- Leaving screws loose: Loose blade or mounting screws can lead to vibration and noise.
- Incorrect wiring: Always follow the manufacturer’s wiring diagram.
- Ignoring blade clearance: Ensure sufficient space around the rotating blades.
- Skipping the power check: Always verify that the circuit is de-energised before handling wiring.
- Installing blades incorrectly: Follow the correct blade orientation and assembly sequence.
- Ignoring wobbling: Persistent wobbling can indicate an installation, mounting, or balancing issue.
- Overlooking the manufacturer’s instructions: Different ceiling fan models can have different mounting and wiring requirements.
How To Choose a Ceiling Fan Before Installation
If you are installing a new fan, consider more than just its appearance. The room size, ceiling height, motor type, blade span, speed settings, airflow, energy efficiency, control options, and installation method can influence your choice.
For bedrooms and living rooms, choose a model that provides comfortable airflow with low operating noise. For larger spaces, consider a fan with an appropriate blade span and airflow capacity. If the ceiling is unusually high, a suitable downrod may be required.
Energy-efficient ceiling fans can also help provide effective air circulation while keeping electricity consumption under control.
How High Should a Ceiling Fan Be Installed?
The ideal installation height depends on the ceiling height and fan design. As a general safety principle, the fan should have adequate clearance from the floor and surrounding objects, while maintaining sufficient space between the blades and ceiling.
For high ceilings, a downrod can help position the fan at a more suitable height. Always follow the manufacturer’s recommended clearances and applicable local electrical and building requirements.
Can You Install a Ceiling Fan Yourself?
A mechanically straightforward ceiling fan installation may be manageable for someone experienced with electrical and DIY work. However, connecting a ceiling fan to household electrical wiring can present a shock and fire risk if done incorrectly.
If you are unsure about electrical connections, ceiling support, grounding, circuit capacity, or local requirements, it is safer to hire a qualified electrician.
Where To Buy a Ceiling Fan Online?
Once you know how to install a ceiling fan, the next step is choosing the right model for your room and application. You can compare ceiling fans based on motor technology, blade size, speed, airflow, power consumption, design, control options, warranty, and price before making a purchase.
For residential, commercial, and other applications, online B2B platforms such as Moglix Business can help buyers explore different electrical and home-improvement products in bulk at wholesale prices and compare specifications before procurement.
Final Thoughts
Learning how to install a ceiling fan becomes easier when the process is broken into clear steps. Start by switching off the power, prepare a suitable mounting point, secure the bracket, assemble the fan, connect the wiring correctly, install the blades, and thoroughly test the unit before regular use.
A properly installed ceiling fan can provide consistent airflow, improve indoor comfort, and operate more smoothly. However, because electrical connections and ceiling support are safety-critical, professional installation is recommended whenever you are uncertain about the work.
FAQs
1. Can I install a ceiling fan where a light fixture was installed?
Not always. The existing electrical box must be suitable for supporting a ceiling fan. A fan-rated box or adequate structural support may be required.
2. How long does it take to install a ceiling fan?
The time depends on the existing wiring, mounting support, fan design, and installer experience. Replacing an existing fan can generally be simpler than creating a completely new installation point.
3. Why does my ceiling fan wobble after installation?
Wobbling can result from loose screws, incorrectly installed blades, an unsuitable mounting surface, blade imbalance, or other mechanical issues. Switch the fan off and inspect the installation.
4. Can I install a ceiling fan on a high ceiling?
Yes. A suitable downrod can be used with compatible ceiling fans to position the fan appropriately. Always follow the manufacturer’s recommended installation requirements.
5. Why is my ceiling fan making noise?
Noise can be caused by loose components, blade imbalance, mounting issues, or normal operating characteristics of the particular fan. Check all accessible fasteners and follow the manufacturer’s troubleshooting instructions.


 Back
Back